
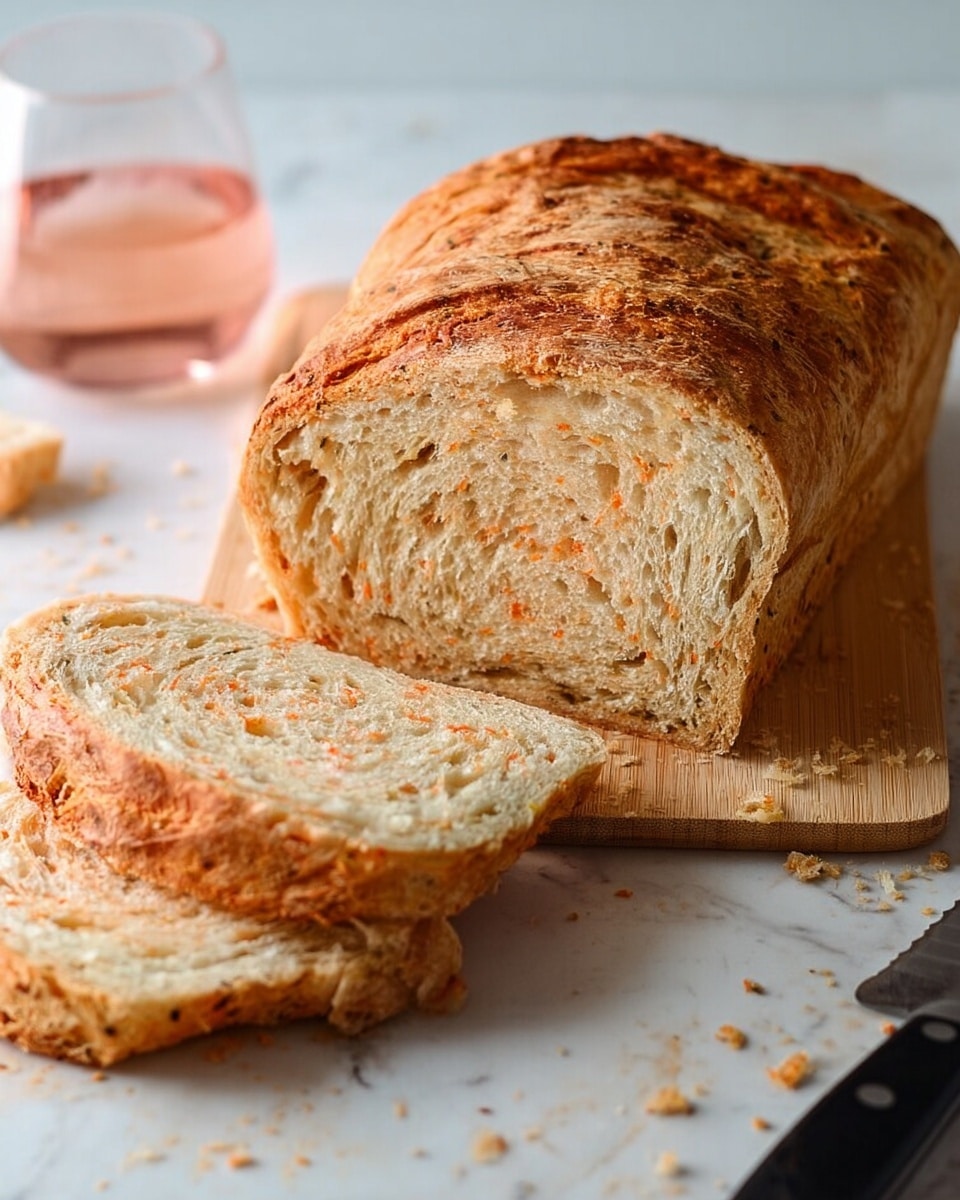
If you’re on the hunt for a bread that’s bursting with flavor yet surprisingly easy to make, you’re going to want to try this Roasted Red Pepper and Chive Bread Recipe. I absolutely love how the sweet, smoky notes from the roasted red peppers marry with the fresh sharpness of chives—it’s like a party in every bite. Plus, this bread has such a beautiful, rustic color and aroma that makes it an instant centerpiece on any table. Trust me, once you bake this at home, it quickly becomes a staple you can’t live without.
Why You’ll Love This Recipe
- Vibrant Flavor Combo: Roasted red peppers and fresh chives give this bread a uniquely delicious taste that’s both savory and aromatic.
- Impressively Simple: The technique is straightforward, even if you’re new to bread baking, making it a perfect beginner-friendly artisan loaf.
- Versatile Use: Delicious on its own, toasted with butter, or as a sandwich base, you’ll find endless ways to enjoy this bread.
- Hands-on Experience: Mixing and kneading teaches you the texture of a good dough—and it’s so satisfying to watch it rise!

Ingredients You’ll Need
Every ingredient in this Roasted Red Pepper and Chive Bread Recipe has a role in creating that perfect loaf, from the soft flour to the punch of garlic powder. I always recommend using good-quality jarred roasted red peppers—the smoky sweetness makes all the difference. And fresh chives, if you can find them, truly elevate the flavor.
- All purpose flour: This forms your dough base; I like to use unbleached for a more natural flavor.
- Dry yeast: Make sure it’s fresh and active—old yeast can lead to a disappointing rise.
- Lukewarm water: Just right—not too hot or cold—to wake up the yeast gently.
- Olive oil: Adds tenderness and richness; extra for greasing your bowl to prevent sticking.
- Roasted red pepper: Jarred or freshly roasted works; chopped finely so it’s evenly distributed.
- Fresh chives: Adds a subtle oniony brightness; freshly chopped for best flavor.
- Granulated garlic powder: Provides a deep, mellow garlic flavor without overpowering.
- Salt: Essential for flavor balance—don’t skip it!
Variations
This Roasted Red Pepper and Chive Bread Recipe is super adaptable. I often like to switch things up depending on what I have on hand or what flavors I’m craving, and you should too! Don’t hesitate to personalize it to your taste—bread making is part science, part art.
- Add Cheese: I sometimes fold in shredded cheddar or mozzarella for a melty surprise—my family goes crazy for this version!
- Herb Swap: If you can’t find chives, try fresh rosemary or thyme for a different herbal punch.
- Spicy Kick: Add a pinch of red pepper flakes or smoked paprika to mix for a subtle heat.
- Gluten-Free Option: Not tested with gluten-free flours, but you could try a blend designed for yeast breads—just expect a different texture.
How to Make Roasted Red Pepper and Chive Bread Recipe
Step 1: Combine and Let Ingredients Rest
Start by tossing every ingredient—except the extra olive oil for your bowl—into your mixing bowl. If you have a stand mixer, this is the perfect job for the rubber spatula to bring everything together. Letting this mix rest for 10 to 15 minutes is a neat little trick I discovered; it helps the flour hydrate better, which means a more elastic dough and an easier kneading process.
Step 2: Knead the Dough Until Smooth
Attach your dough hook (or use your handiwork and knead by hand) and knead for about 5 minutes. You’ll notice the dough color shifts wonderfully due to those lovely red peppers breaking down—don’t be alarmed, that’s the charm of this loaf! If the dough sticks too much to the sides, sprinkle in flour one tablespoon at a time until it pulls away easily. The texture should be soft but not sticky.
Step 3: First Rise in a Warm Bowl
Lightly oil a large bowl so your dough doesn’t cling, then pop your dough in and cover it with a clean kitchen towel. Set it somewhere warm and draft-free so it can rise for about an hour. When I first started making this, I learned that rushing the rise or skipping the cover can make your dough drier or mess with the texture, so don’t skip this step!
Step 4: Shape, Second Rise, and Prep to Bake
After your dough has doubled in size, give it a gentle punch down to release air bubbles and shape it into a loaf. I find that placing it on parchment paper on a baking sheet makes transferring it to the oven easy and clean. Loosely cover your shaped dough and let it rise again for another hour—this step helps develop a better crumb and crust.
Step 5: Bake to Golden Perfection
Preheat your oven to 400°F (about 200°C). Just before baking, sprinkle a light dusting of flour on top and score the loaf with three shallow cuts using a serrated knife or blade. This not only looks beautiful but also helps the bread expand nicely in the oven. Bake on the middle rack for 30 minutes until it’s golden brown and has that irresistible crust.
Step 6: Cool and Enjoy
Don’t dive in immediately, as tempting as it might be! Let your loaf cool slightly—or completely—on a wire rack before slicing. This resting period lets the crumb set and stops it from becoming gummy. I love this bread best when just a bit warm with a spread of butter or olive oil. Enjoy!
Pro Tips for Making Roasted Red Pepper and Chive Bread Recipe
- Room Temperature Water: I learned early on that water that’s too hot kills the yeast—lukewarm is key to get a good rise every time.
- Don’t Over Flour: Adding flour when kneading should be minimal; too much can dry out your dough and make it dense.
- Proper Scoring: Using a sharp blade instead of a dull knife gives cleaner cuts that help the bread expand beautifully.
- Patience with Rising: Avoid rushing the rising steps—good things take time, and your loaf will reward the wait with excellent texture.
How to Serve Roasted Red Pepper and Chive Bread Recipe
Garnishes
When it comes to garnishing, I keep it simple—just a light smear of softened butter or a drizzle of extra virgin olive oil with a sprinkle of flaky sea salt. Sometimes I add a touch of fresh herbs like chives or parsley on top for an extra fresh look and flavor boost.
Side Dishes
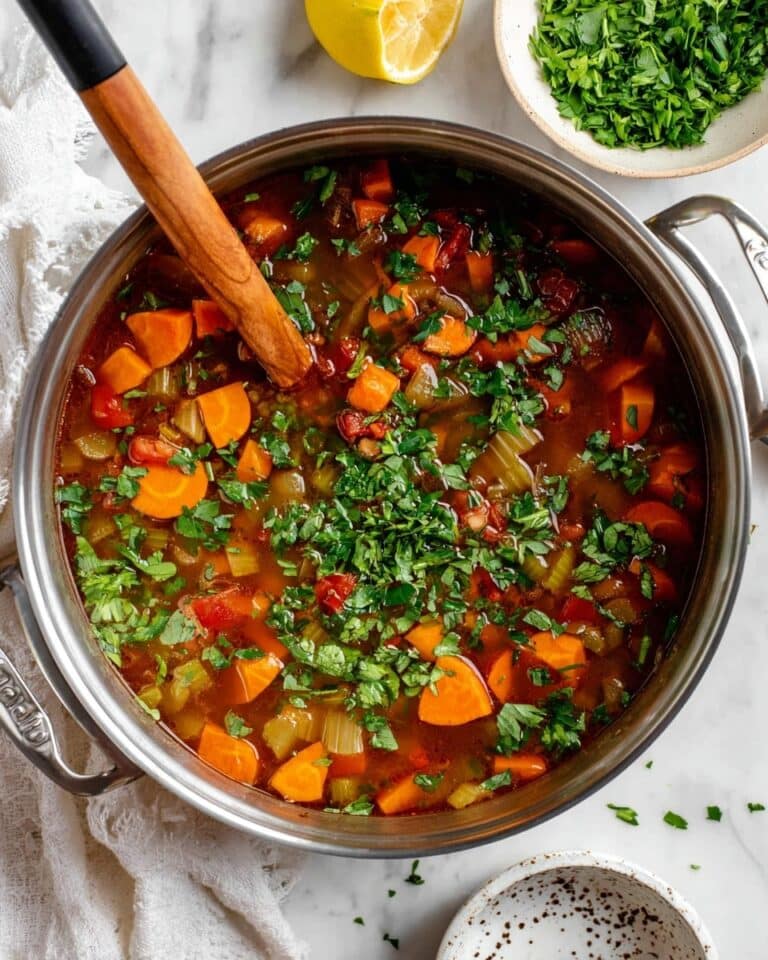
This bread pairs wonderfully with hearty soups, like creamy tomato or butternut squash. I also enjoy it alongside a fresh green salad with lemon vinaigrette, or with charcuterie boards that include cheeses, olives, and cured meats.
Creative Ways to Present
For special occasions, I like cutting the loaf into thick slices and toasting them with garlic butter, then stacking them with layered roasted veggies or bruschetta toppings for a colorful appetizer platter. You might also try serving small sandwiches at a brunch or picnic, showcasing its vibrant color and flavors.
Make Ahead and Storage
Storing Leftovers
I usually store leftover bread wrapped loosely in a clean kitchen towel inside a bread box or a paper bag to maintain the crust’s texture while keeping the inside soft. It tends to stay fresh for two days like this before I prefer to freeze it.
Freezing
This bread freezes really well. I slice it first, wrap slices individually or in small batches with plastic wrap, and then tuck them in a freezer bag. This way, you can take out just what you need without thawing the whole loaf.
Reheating
My favorite method for reheating is to toast the slices lightly or warm them in a preheated oven at 350°F for 5-7 minutes wrapped in foil—to bring back that fresh-out-of-the-oven warmth and maintain softness without drying out.
FAQs
-
Can I use fresh roasted red peppers instead of jarred?
Absolutely! Fresh roasted red peppers work beautifully in this recipe. Just be sure to chop them finely and allow any excess moisture to drain, so your dough isn’t too wet. I often roast my own when peppers are in season, and it brings an even fresher taste.
-
What if I don’t have a stand mixer?
No worries—you can mix and knead this dough by hand! Use a large bowl to combine ingredients, then knead on a lightly floured surface for 8-10 minutes until the dough is smooth and elastic. It’s a great way to connect with the process, and you can still get fantastic results.
-
How can I tell when the bread is done baking?
Your bread should be golden brown with a firm crust. If you tap the bottom of the loaf, it should sound hollow—that’s a classic test for doneness. I also use an instant-read thermometer aiming for about 190°F in the center for perfect baking.
-
Can I use this recipe to make rolls instead of a loaf?
Yes! Just divide the dough into even portions, shape them into rolls, and adjust the second rise to about 30-40 minutes depending on size. Bake at 400°F for 15-20 minutes until golden. Rolls are just as flavorful and perfect for sandwiches or snacks.
Final Thoughts
This Roasted Red Pepper and Chive Bread Recipe holds a special place in my kitchen repertoire—it’s simple enough for weekday baking but impressive enough to serve guests. I love how it brings a splash of color and a burst of flavor to any meal or snack time. If you’re looking for a bread that’s a little different but endlessly satisfying, give this a try—you’ll enjoy every chewy, flavorful slice as much as I do.
Print
Roasted Red Pepper and Chive Bread Recipe
- Prep Time: 30 minutes
- Cook Time: 30 minutes
- Total Time: 135 minutes
- Yield: 12 slices
- Category: Bread
- Method: Baking
- Cuisine: American
Description
This Roasted Red Pepper Bread is a flavorful homemade loaf infused with sweet roasted red peppers, fresh chives, and garlic powder. Soft and aromatic, it makes a perfect accompaniment to any meal or a delicious base for sandwiches. The bread is easy to prepare with simple ingredients and uses a stand mixer or hand kneading with a clear and straightforward rise and bake method.
Ingredients
Dry Ingredients
- 2¾ cup (410 grams) all purpose flour
- 1½ tsp dry yeast
- 1½ tsp granulated garlic powder
- ½ tsp salt
Wet Ingredients
- 1 cup (250 mL) lukewarm water
- 2 tsp olive oil (plus more for greasing bowl)
- ½ cup roasted red pepper, chopped (jarred)
Herbs
- 2 tbsp chopped fresh chives
Instructions
- Combine Ingredients: Place all dry and wet ingredients, except the extra olive oil for greasing, into the mixing bowl of your stand mixer. Use a rubber spatula to mix them thoroughly until well combined. If mixing by hand, use a large bowl for this step.
- Initial Rest: Let the mixture sit at room temperature for 10 to 15 minutes to allow the yeast to activate and the ingredients to hydrate properly.
- Knead the Dough: Attach the dough hook to your stand mixer or hand mixer and knead the dough for about 5 minutes. If the dough is sticking to the sides of the bowl, add flour one tablespoon at a time until it forms a smooth dough. The red pepper will break down and color the dough, which adds to its unique look and flavor. Alternatively, knead by hand until smooth and elastic.
- First Rise: Transfer the dough to a well-oiled bowl. Cover it with a clean kitchen towel and place it in a warm, draft-free area to rise for 1 hour or until doubled in size.
- Shape the Dough: After the dough has risen, punch it down gently to release gases. Shape it into a loaf and place it onto a parchment-lined baking sheet.
- Second Rise: Let the shaped dough rise again, covered loosely, in a warm place for about 1 hour until it puffs up noticeably.
- Preheat Oven: Set your oven to 400 degrees Fahrenheit (204 degrees Celsius) so it’s hot and ready for baking.
- Prepare for Baking: Lightly dust the top of the loaf with flour and score it three times using a serrated knife or blade. This helps control the expansion of the bread while baking.
- Bake: Place the loaf on the middle rack of the oven and bake for 30 minutes until it is golden brown and sounds hollow when tapped on the bottom.
- Cool: Remove the bread from the oven and allow it to cool on a wire rack for at least 15 minutes before slicing to preserve its texture and flavor.
- Serve and Enjoy: Slice and enjoy this aromatic roasted red pepper bread with your favorite spreads, soups, or meals.
Notes
- This bread combines the sweet aroma of roasted red peppers with the savory flavors of garlic and fresh chives, creating a unique and delicious loaf perfect for any occasion.
- Use jarred roasted red peppers for convenience, but homemade roasted peppers can add extra freshness and flavor.
- Make sure your water is lukewarm to properly activate the yeast without killing it.
- If you prefer, you can knead the dough by hand instead of using a mixer.
- Allow the bread to cool completely for easier slicing and better texture.
Nutrition
- Serving Size: 1 slice
- Calories: 116 kcal
- Sugar: 1 g
- Sodium: 178 mg
- Fat: 1 g
- Saturated Fat: 1 g
- Unsaturated Fat: 2 g
- Trans Fat: 0 g
- Carbohydrates: 23 g
- Fiber: 1 g
- Protein: 4 g
- Cholesterol: 0 mg


