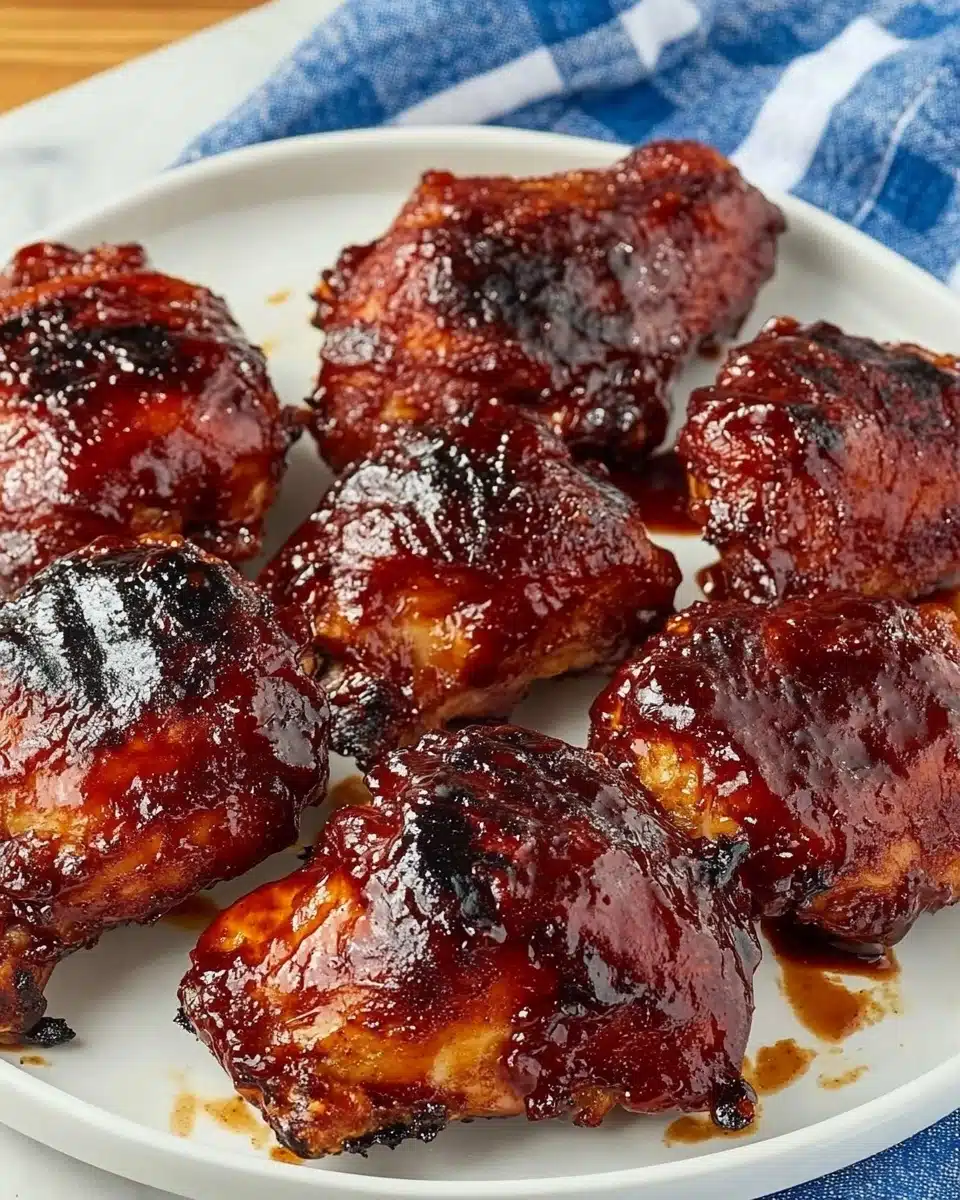
I absolutely love this Oven BBQ Chicken Recipe because it combines that irresistible tangy-sweet BBQ flavor with the rich, juicy texture of bone-in, skin-on chicken thighs. It’s the kind of dish that’s perfect for any night when you want a comforting, crowd-pleasing meal without firing up the grill. I’ve made this recipe more times than I can count, especially on busy weeknights and casual weekend dinners, and it never disappoints.
What makes this Oven BBQ Chicken Recipe truly special is the layer of peach preserves stirred into the BBQ sauce—it adds such a lovely fruity depth that you don’t always get with traditional BBQ chicken. Plus, roasting the chicken in the oven means you get that perfect, crispy skin without any fuss, which is a lifesaver if you don’t have outdoor grilling space or when the weather isn’t cooperating.
Why You’ll Love This Recipe
- Effortless Weeknight Meal: You don’t need a grill or complicated tools—just your oven and a few simple ingredients.
- Juicy & Crispy: The bone-in chicken stays incredibly juicy inside while the skin crisps up beautifully.
- Flavor Boost: The peach preserves in the BBQ sauce add a sweet, unexpected twist that makes it unforgettable.
- Family Favorite: My family goes crazy for this recipe—they always ask for seconds and leftovers!

Ingredients You’ll Need
These simple ingredients come together to create a luscious BBQ sauce and perfectly seasoned chicken that’s golden and tender. When you shop, choosing good quality BBQ sauce and fresh chicken thighs will make all the difference.
- BBQ sauce: Pick your favorite brand or homemade version—this is the base of your sauce, so choose one you really enjoy.
- Peach preserves: Believe me, this adds a wonderful fruity sweetness that makes the sauce pop without being overpowering.
- Garlic: Freshly grated garlic brings a subtle kick and depth to the sauce.
- Hot sauce (optional): Adds just a tiny bit of heat if you like your BBQ with a little more kick.
- Olive oil: For brushing the pan and keeping the chicken skin from sticking.
- Chicken thighs (bone-in, skin-on): These stay juicy and tender throughout baking, and the skin crisps up so nicely.
- Kosher salt: Essential for seasoning, helps bring out all the flavors.
- Ground black pepper: Adds a mild, aromatic punch.
Variations
I like to personalize this Oven BBQ Chicken Recipe all the time, depending on what I have on hand or what flavors are calling my name. Feel free to tweak it to suit your taste or dietary needs—the basic technique is super forgiving and flexible.
- Spicy Twist: When I want extra heat, I add a few dashes of cayenne pepper or chipotle powder to the sauce before heating it up—it really wakes up the flavor.
- Smokier Flavor: Sometimes I add a splash of liquid smoke into the BBQ sauce to mimic that grill taste when the weather isn’t right for outdoor cooking.
- Gluten-Free: Use a gluten-free BBQ sauce and double-check your preserves to keep this recipe safe for gluten-sensitive folks.
- Different Chicken Cuts: I’ve tried this with drumsticks and even boneless thighs—just keep an eye on cooking time to avoid drying out.
How to Make Oven BBQ Chicken Recipe
Step 1: Warm Up Your BBQ Sauce with Peach Preserves
Start by combining your BBQ sauce, peach preserves, grated garlic, and optional hot sauce in a medium saucepan. Heat it gently over medium heat for about 5 to 10 minutes, stirring occasionally until the preserves are melted and the mixture is nice and warm. This helps the flavors meld beautifully—trust me, it’s worth the extra step to get that rich, glossy sauce.
Step 2: Prep the Oven and Chicken
Preheat your oven to 400°F. Then line two rimmed baking sheets with foil and drizzle a bit of olive oil on them to prevent sticking and make clean-up a breeze—really, this tip saves a lot of hassle later. Place the chicken thighs skin-side down evenly spaced on the pans. Give them a good sprinkle of kosher salt and ground black pepper to enhance the natural chicken flavors.
Step 3: Roast and Sauce in Layers
Roast the chicken, skin-side down, for about 25 minutes. When the time’s up, pull the pans out carefully and brush the thighs with that delicious BBQ sauce you warmed up. Flip each piece gently to skin-side up—watch out not to tear the skin to keep it crispy—and brush more sauce on top. Pop them back into the oven for 7 minutes.
Repeat brushing on more sauce and roasting for another 7 minutes. Then again, brush on more sauce and crank your oven up to 425°F for a final 5 to 7 minutes. This last step caramelizes the sauce edges and crisps the skin even more while making sure the chicken is fully cooked through.
Once done, let the chicken rest for at least 10 minutes before serving—this little pause helps all the juices redistribute, giving you juicy, flavorful bites.
Pro Tips for Making Oven BBQ Chicken Recipe
- Don’t Skip the Foil Lining: It really makes cleanup effortless and prevents the sugary BBQ sauce from sticking and burning on your pan.
- Pat Chicken Dry First: Before seasoning and roasting, give the chicken skin a quick pat with paper towels—dry skin crisps up much better.
- Use a Meat Thermometer: To be sure your chicken is perfectly cooked, check for an internal temperature of 165°F in the thickest part.
- Gentle Flipping: When turning the chicken, use a thin spatula and go slow to keep the skin intact and looking beautiful.
How to Serve Oven BBQ Chicken Recipe
Garnishes
I love topping this BBQ chicken with a sprinkle of freshly chopped parsley or green onions for a pop of color and fresh flavor. Sometimes, a light drizzle of extra BBQ sauce on the plate is a nice touch, too.
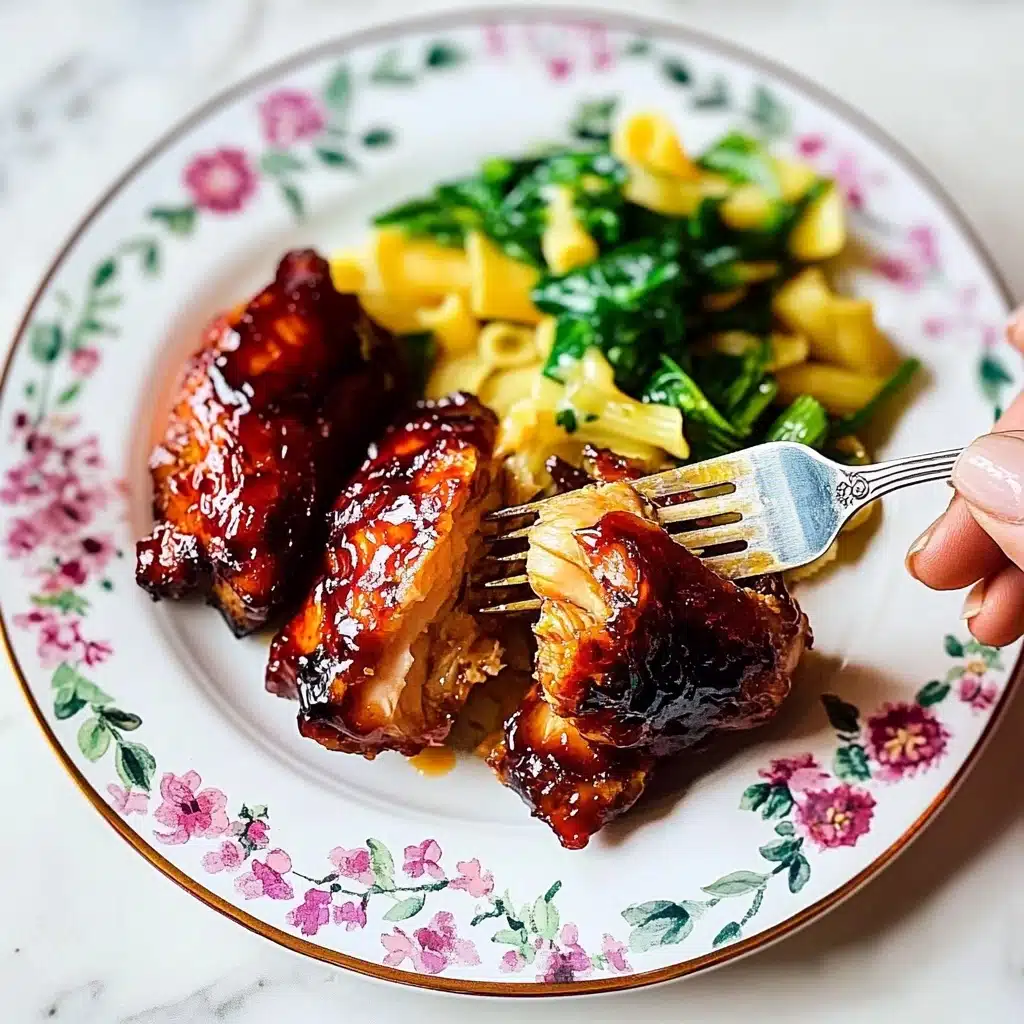
Side Dishes
This chicken pairs wonderfully with classic sides like creamy coleslaw, buttery corn on the cob, or even a tangy cucumber salad. My family also enjoys it alongside roasted sweet potatoes or garlic mashed potatoes for a comforting meal.
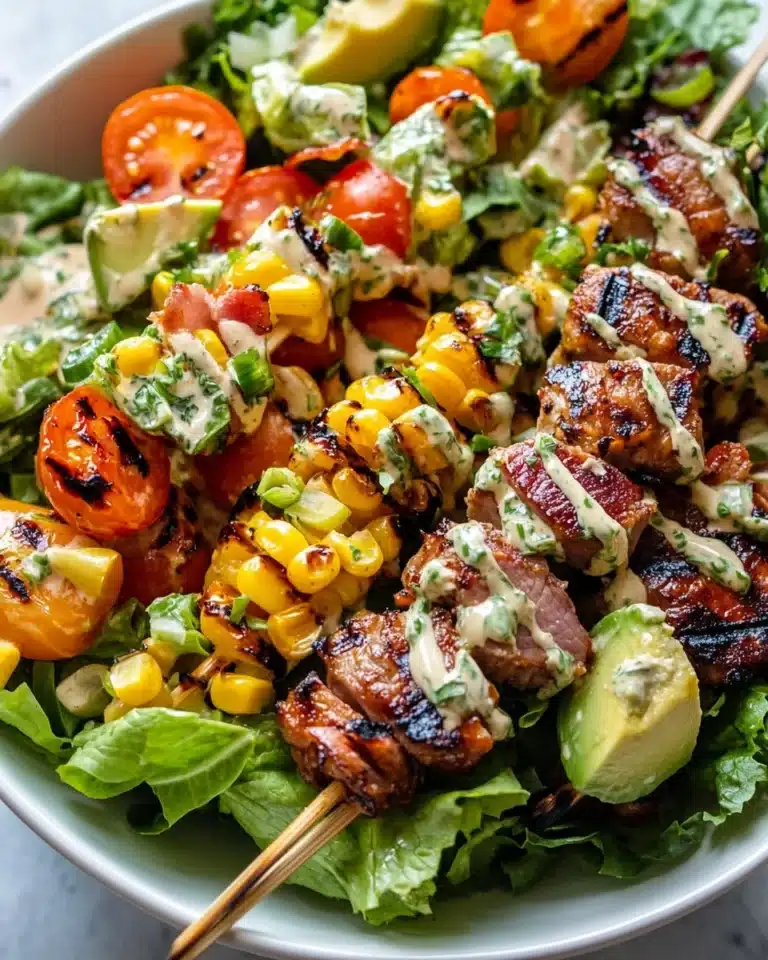
Creative Ways to Present
For special occasions, I like to serve the chicken on a wooden board with a variety of dipping sauces—like ranch, honey mustard, or extra BBQ sauce—and some grilled veggies alongside. It feels festive and inviting, perfect for sharing with friends or family gatherings.
Make Ahead and Storage
Storing Leftovers
I usually store leftover chicken in an airtight container in the fridge, and it keeps well for up to 3 days. Make sure to let it cool before sealing to avoid soggy skin, and you’ll find it reheats nicely without losing its juicy texture.
Freezing
Freezing is definitely doable with this Oven BBQ Chicken Recipe. I wrap individual pieces tightly in plastic wrap, then place them in a freezer-safe bag. It keeps well for about 2 to 3 months. When you’re ready to eat, thaw overnight in the fridge before reheating.
Reheating
To bring back that crispy skin after storing, I reheat the chicken in a 375°F oven for about 10-15 minutes. Avoid the microwave if you can, as it tends to make the skin soggy and the meat dry. This little extra step keeps your leftovers tasting almost as good as fresh!
FAQs
-
Can I use boneless chicken breasts instead of thighs for this Oven BBQ Chicken Recipe?
You can absolutely use boneless chicken breasts, but keep in mind they cook faster and can dry out more easily. I recommend reducing the roasting time and watching closely—about 20-25 minutes total—and using a meat thermometer to avoid overcooking.
-
What if I don’t have peach preserves—can I substitute something else?
If peach preserves aren’t on hand, apricot preserves or even a tablespoon of honey stirred into the BBQ sauce can provide a similar sweet balance. The key is to add a bit of fruity sweetness to complement the tangy sauce.
-
How do I ensure the chicken skin is crispy and not soggy?
Patting the chicken skin dry before cooking and not overcrowding the pan helps a lot. Also, flip the chicken carefully and avoid stirring or handling too much once crispy. Finally, finishing on a higher temperature roast caramelizes the sauce and crisps the skin nicely.
-
Can I make the sauce ahead of time?
Yes! The BBQ sauce with peach preserves can be made a day ahead and stored in the fridge. Just warm it gently before using it to brush on the chicken for best results.
Final Thoughts
This Oven BBQ Chicken Recipe has become my go-to when I want something that feels homemade but doesn’t require standing over a hot grill or fiddling with complicated steps. I hope you’ll give it a try and enjoy how effortlessly delicious it is. Once you nail this method, you’ll find yourself coming back to it again and again, just like my family does. Trust me—there’s something so comforting about juicy, crispy BBQ chicken fresh out of the oven, especially when shared with people you love.
Print
Oven BBQ Chicken Recipe
- Prep Time: 30 mins
- Cook Time: 40 mins
- Total Time: 1 hr 10 mins
- Yield: 12 servings
- Category: Dinner
- Method: Baking
- Cuisine: American
Description
This Oven BBQ Chicken recipe features tender, juicy bone-in, skin-on chicken thighs roasted to perfection with a flavorful homemade BBQ sauce made from your favorite barbecue sauce, peach preserves, garlic, and an optional kick of hot sauce. The chicken is oven-roasted in stages with continuous basting to create a beautifully glazed and caramelized finish that’s perfect for any casual dinner or gathering.
Ingredients
BBQ Sauce
- 3 cups your favorite BBQ sauce
- 1/2 cup peach preserves
- 1 clove garlic, grated
- Hot sauce, optional, to taste
Chicken
- Olive oil for brushing
- 12 bone-in, skin-on chicken thighs
- 1 tsp kosher salt
- 1/2 tsp ground black pepper
Instructions
- Prepare the sauce: In a medium saucepan, combine the BBQ sauce, peach preserves, grated garlic, and hot sauce if using. Heat over medium heat for 5 to 10 minutes, stirring occasionally, until the sauce is hot and well blended. Set aside.
- Preheat the oven and prepare pans: Preheat your oven to 400°F (200°C). Line two rimmed baking sheets with foil and drizzle with olive oil to prevent sticking.
- Arrange and season chicken: Place the chicken thighs skin-side down on the prepared baking sheets. Sprinkle evenly with kosher salt and ground black pepper.
- Roast chicken—first stage: Roast the chicken in the oven for 25 minutes to start cooking through and to render some fat from the skin.
- Baste and flip chicken: Remove the baking sheets from the oven briefly. Brush the skinless bottom side of the chicken thighs with the prepared BBQ sauce. Carefully flip the thighs skin-side up using a spatula, making sure not to tear the skin. Brush the skin side thoroughly with more sauce.
- Roast chicken—second stage: Return the chicken to the oven and roast for 7 minutes. Remove and brush more BBQ sauce on the skin side.
- Continue roasting with basting: Roast the chicken for another 7 minutes and then remove again to brush on another layer of sauce.
- Final roasting and caramelizing: Increase the oven temperature to 425°F (220°C). Return the chicken to the oven and roast for an additional 5 to 7 minutes, or until the sauce is bubbling and starting to brown at the edges and the chicken is cooked through.
- Rest and serve: Remove the chicken from the oven and let it rest for at least 10 minutes before serving. This allows the juices to redistribute for moist, flavorful chicken.
Notes
- Line your baking sheets with foil for easy cleanup.
- Use bone-in, skin-on thighs for optimal flavor and juiciness.
- Adjust the amount of hot sauce based on your preferred heat level.
- Allow the chicken to rest after cooking to maximize moistness.
- This recipe yields 12 servings, perfect for a family meal or gathering.


