If you’re on the hunt for a fun, festive treat that’s as adorable as it is delicious, you’re going to flip for my Mummy Hot Dogs Recipe. I absolutely love how these spooky snacks come together quickly and still wow every time. Whether you’re prepping for a Halloween party or just want to delight the kids with something cute and tasty, this recipe has got you covered. Stick around because I’ll share all my best tips so yours turn out perfect every single time!
Why You’ll Love This Recipe
- Super Easy to Make: You’ll find that just a handful of ingredients and a quick prep time make this a breeze even for beginners.
- Perfect for Kids: My kids go crazy for the spooky look and love helping me assemble them!
- Customizable Fun: You can get creative with different dipping sauces or toppings to personalize your mummies.
- Great for Parties: These are always a hit at gatherings—so grab your favorite mustard and ketchup dips and get ready to impress.

Ingredients You’ll Need
These simple ingredients combine to create that perfectly wrapped-up mummy look and delicious flavor. When shopping, opt for crescent roll dough that’s fresh and pliable—this really makes assembly easier and tastier.
- Crescent Roll Dough: Use refrigerated dough for easy slicing and wrapping; I recommend crescent rolls for that golden finish.
- Hot Dogs: Classic beef or turkey hot dogs work great—choose your favorite, or even try veggie dogs for a fun twist.
- Mustard or Ketchup: For the “eyes,” these condiments add a pop of color and extra flavor.
Variations
I love mixing things up depending on the season or who I’m cooking for. This recipe is super versatile, so feel free to get creative and make it your own!
- Vegetarian Variation: Swap hot dogs for vegetarian sausages; I once made these for a friend’s party, and everyone loved the plant-based version just as much.
- Cheesy Twist: Add thin slices of cheese inside the dough wrap before baking for a melty surprise.
- Spicy Version: Brush the dough with a little chili powder or paprika for a subtle kick my family can’t resist.
How to Make Mummy Hot Dogs Recipe
Step 1: Preheat and Prepare
Start by preheating your oven to 375°F (190°C). Line a baking sheet with parchment paper or a silicone mat to keep things neat and help the mummies bake evenly. Trust me, this little prep step saves cleanup time—which I always appreciate.
Step 2: Slice the Dough
Open your refrigerated crescent roll dough and unroll it carefully on a clean surface. Using a sharp knife or pizza cutter, slice the dough into thin strips—around 1/4 inch wide works best. You want enough strips to wrap your hot dogs in a mummy-style crisscross pattern. I learned that thinner strips bake more crisply and look more authentic!
Step 3: Wrap Your Mummies
Take one hot dog at a time and start wrapping it with the dough strips, leaving a small space for “eyes.” Don’t wrap too tightly, as the dough needs room to expand while baking. This is where patience pays off—take your time making it look *just* right.
Step 4: Bake until Golden
Place your wrapped mummies on the prepared baking sheet and bake for 12-15 minutes, or until the dough is puffed and golden brown. I always peek around the 10-minute mark to make sure they’re not overcooking. That golden crunch is exactly what you want!
Step 5: Add the Creepy Eyes
Once out of the oven and slightly cooled, carefully dot mustard or ketchup where the eyes should go. I use the tip of a toothpick for precision—this way the eyes turn out super neat. If you’re making these with kids, they’ll have a blast decorating!
Pro Tips for Making Mummy Hot Dogs Recipe
- Don’t Overwrap: I learned the hard way that too much dough can make these doughy instead of crisp—less is more for that perfect mummy look.
- Keep Dough Cold: If your dough softens too much, pop it in the fridge for 10 minutes before wrapping; it handles so much better when chilled.
- Use a Toothpick for Eyes: This helps you put tiny mustard or ketchup eyes on without making a mess—game changer!
- Bake on Middle Rack: To prevent the bottom from burning while the dough cooks through, the middle oven rack is your best friend.
How to Serve Mummy Hot Dogs Recipe
Garnishes
I usually keep it simple with mustard and ketchup “eyes,” but you can get playful by adding tiny dots of mayonnaise or even a little relish if you want to jazz things up. A sprinkle of sesame seeds on the dough gives a fun texture too!
Side Dishes
These mummy dogs pair perfectly with classic sides like crunchy carrot sticks, sweet potato fries, or even a simple tossed salad if you want something fresh. For a Halloween party, I love adding some “monster” themed chips or a seasonal pumpkin soup for extra fun.
Creative Ways to Present
Once, I arranged these mummies standing up in a big bowl, surrounded by shredded lettuce “grass” and toy spiders for a creepy-cute Halloween display that was a total hit with the kids. You could also serve them on sticks like corn dogs—easy for little hands to hold and even more fun!
Make Ahead and Storage
Storing Leftovers
Once cooled, pop any leftovers into an airtight container and store in the fridge for up to 3 days. When I’ve done this, the dough stays nicely soft but you lose a bit of that fresh-baked crispness.
Freezing
For longer storage, wrap each mummy individually in plastic wrap and freeze for up to 2 months. I’ve frozen mine successfully either before or after baking; just thaw overnight in the fridge and reheat before serving.
Reheating
To reheat, pop your mummies in a 350°F oven for 5-7 minutes or until warmed through. This brings back some of that freshly baked texture much better than the microwave, which tends to make the dough chewy.
FAQs
-
Can I use refrigerated biscuit dough instead of crescent rolls for the Mummy Hot Dogs Recipe?
Absolutely! Biscuit dough can work well because it’s soft and easy to handle, though crescent roll dough tends to stretch more and gives that classic flaky texture. Just slice your biscuit dough thinly and wrap as you would with crescent dough.
-
How do I make the “eyes” stay on better for the mummy hot dogs?
A simple trick is to add the mustard or ketchup eyes right after baking, while the dough is still warm so they adhere better. You can also use tiny dots of cream cheese or mayo as glue if you want to attach edible candy eyes for a fun twist!
-
Can I prepare the mummies in advance and bake them later?
Yes! You can assemble the wrapped hot dogs and store them covered in the fridge for up to a day before baking. Just be sure they’re well wrapped to prevent the dough from drying out.
Final Thoughts
Honestly, this Mummy Hot Dogs Recipe always brings me back to those fun, cozy days of cooking with my family and sharing laughs. It’s one of those simple pleasures that’s both creative and comforting, perfect for getting everyone excited in the kitchen. I can’t recommend it enough—give it a try, and I bet you’ll see everyone asking for seconds (and the recipe!) too.
Print
Mummy Hot Dogs Recipe
- Prep Time: 10 minutes
- Cook Time: 9 minutes
- Total Time: 19 minutes
- Yield: 12 cookies
- Category: Dessert
- Method: Baking
- Cuisine: American
Description
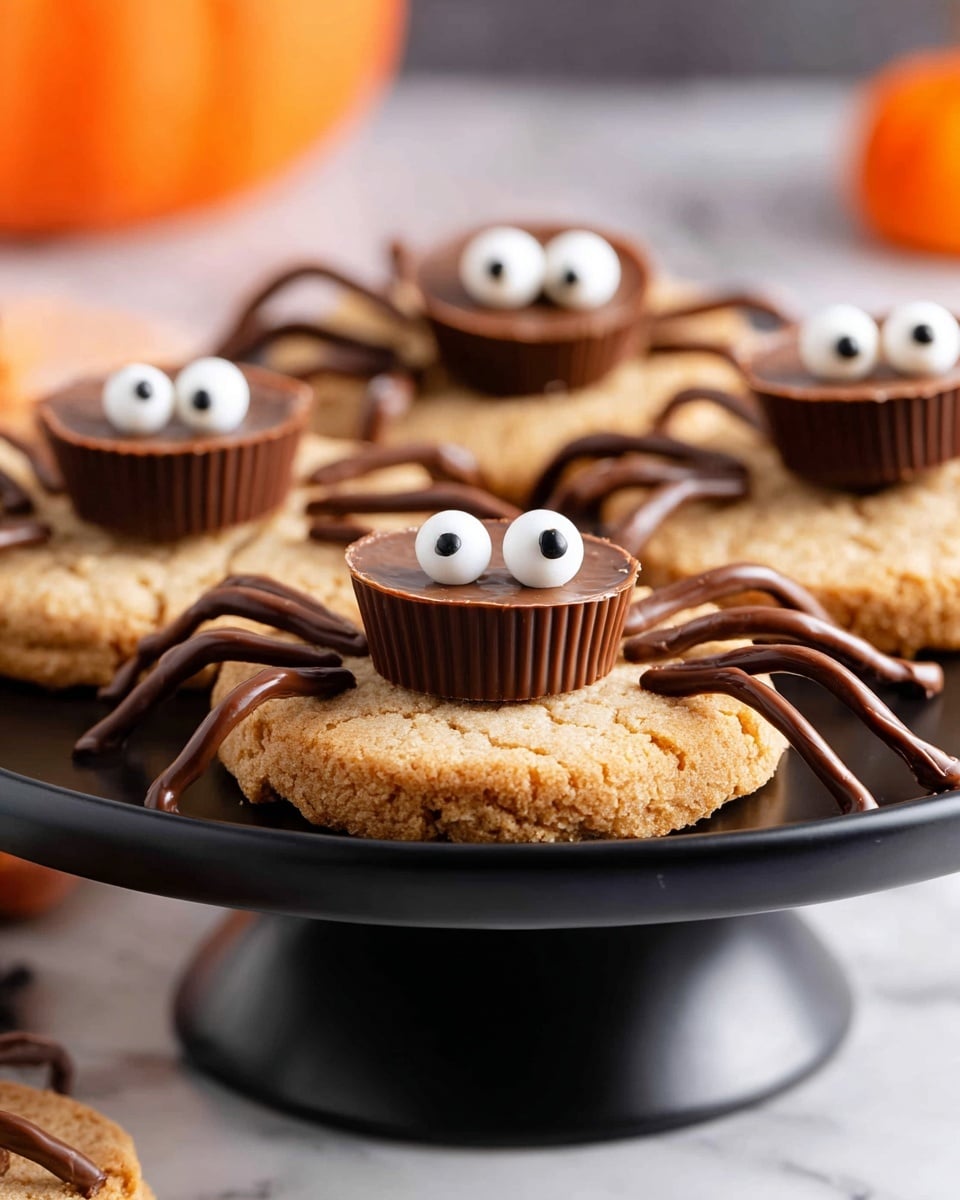
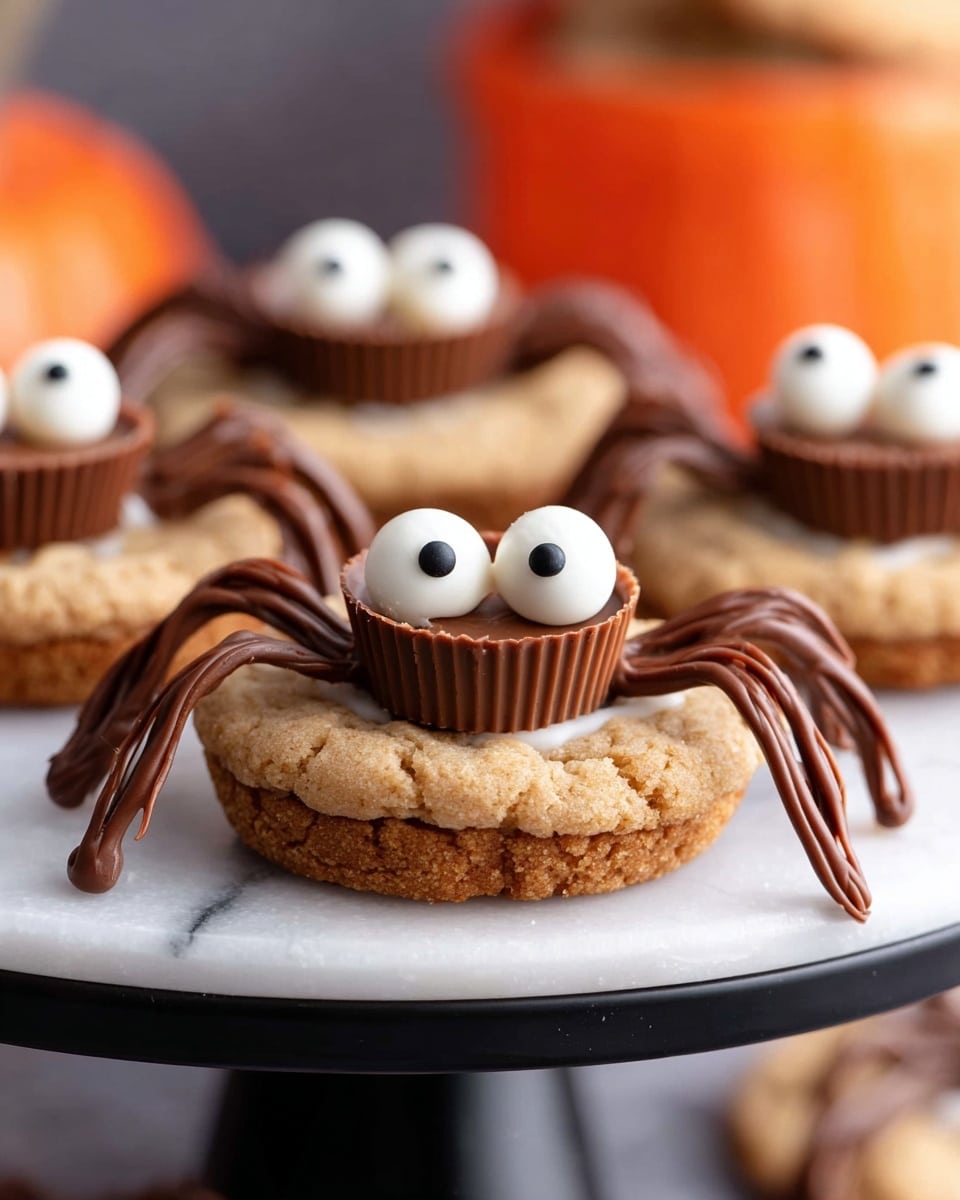
These spooky and delicious Spider Cookies combine creamy peanut butter cookies topped with miniature Reese’s peanut butter cups and candy eyes, decorated with melted chocolate to create adorable spider designs—perfect for Halloween or any fun occasion.
Ingredients
Cookie Dough
- 1 cup creamy peanut butter
- 1/2 cup granulated sugar, plus more for rolling
- 1 egg
Decoration
- 1/4 cup chocolate melting wafers
- 12 miniature Reese’s peanut butter cups
- 24 mini candy eyes
Instructions
- Make cookie dough: Preheat your oven to 350°F (175°C). Line a baking sheet with parchment paper or a baking mat. In a medium bowl, mix together 1 cup of creamy peanut butter, 1/2 cup granulated sugar, and 1 egg until well combined. If the dough feels too sticky to handle, refrigerate it for 10 to 20 minutes until it firms up slightly.
- Roll in sugar: Using a medium cookie scoop or your hands, form the dough into twelve 1-inch balls. Roll each ball generously in granulated sugar, then place them onto the prepared baking sheet. Gently press each ball down with a fork to create a crisscross pattern on top.
- Bake: Bake the cookies for 8 to 10 minutes, or until the bottoms are very lightly browned. Remove the baking sheet from the oven and allow the cookies to rest on the pan for 2 minutes to set.
- Place peanut butter cups: While the cookies are still warm, gently press one miniature Reese’s peanut butter cup onto the center top of each cookie. Then transfer the cookies to a cooling rack to cool completely.
- Decorate like spiders: Melt the chocolate melting wafers in a microwave-safe bowl by heating in 30-second intervals, stirring well between each until fully smooth. Transfer the melted chocolate to a small zip-top bag and snip off a tiny corner to create a piping tip. Pipe two small dots on top of each Reese’s cup and attach two mini candy eyes onto the dots. Next, use the melted chocolate to draw four legs on each side of the peanut butter cup to complete the spider design. Allow the chocolate to harden before serving.
Notes
- These peanut butter spider cookies make a festive and fun treat, ideal for Halloween celebrations.
- If cookie dough is sticky and hard to handle, chilling it briefly helps with rolling.
- You can substitute chocolate melting wafers with any good-quality melting chocolate or chocolate chips.
- Be sure to let the cookies cool completely before decorating to prevent melting of the candy eyes.
Nutrition
- Serving Size: 1 cookie
- Calories: 273 kcal
- Sugar: 20 g
- Sodium: 199 mg
- Fat: 17 g
- Saturated Fat: 4 g
- Unsaturated Fat: 12 g
- Trans Fat: 1 g
- Carbohydrates: 26 g
- Fiber: 2 g
- Protein: 8 g
- Cholesterol: 15 mg


