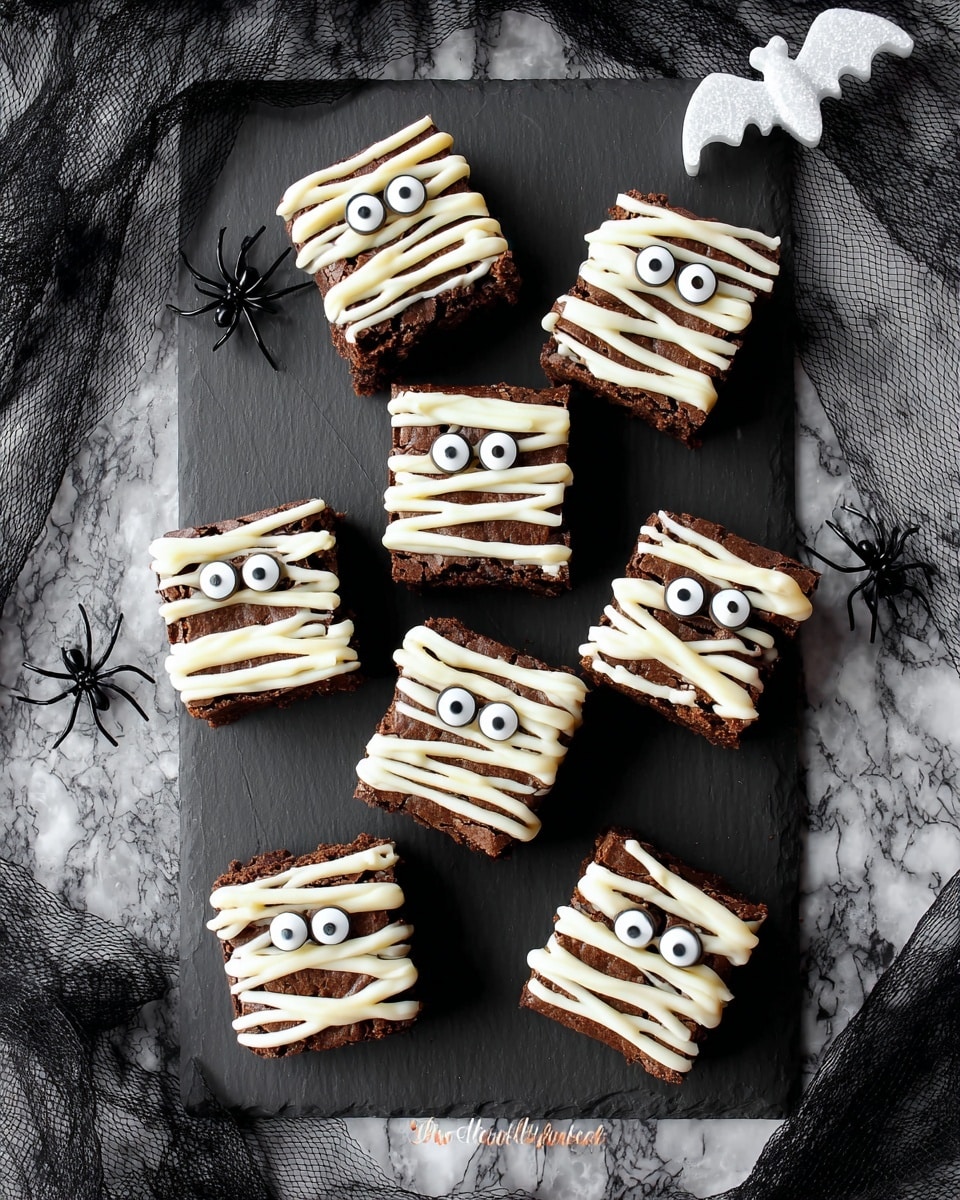
If you’re looking for a fun, spooky treat that’s as delicious as it is adorable, you’re going to want to try this Mummy Brownies for Halloween Recipe. It’s one of those playful desserts that gets everyone excited—even the kiddos. I love how these brownies are rich and fudgy, but the cream cheese “bandages” and candy eyeballs make them totally festive and perfect for any Halloween gathering. Stick around, and I’ll walk you through every step to make sure your mummy brownies look great and taste even better.
Why You’ll Love This Recipe
- Simple and Quick: You can put these mummies together in about 10 minutes, making them perfect for last-minute Halloween fun.
- Kid-Friendly Creativity: Decorating is super easy and kids love placing the candy eyeballs and “bandages.”
- Rich, Fudgy Flavor: The cream cheese icing adds a creamy tang that balances the chocolatey brownies perfectly.
- Great for Parties: These brownies are a guaranteed crowd-pleaser and they look impressive, even if you’re no pro decorator.

Ingredients You’ll Need
The magic of this Mummy Brownies for Halloween Recipe is how simple ingredients come together to create something so festive and fun. I like to start with good-quality brownies—whether homemade or store-bought—and then focus on the cream cheese icing which makes all the difference.
- Cream cheese: Make sure it’s at room temperature for smooth mixing—cold cream cheese can make the icing lumpy.
- Butter (unsalted): Room temperature butter blends effortlessly with cream cheese for the perfect bandage texture.
- Vanilla extract: A small splash lifts the flavor of the cream cheese icing beautifully.
- Confectioners sugar: This keeps the icing silky smooth without any gritty texture.
- Brownies: Go with any brownie you love—square or round; thicker brownies work best so the decorations hold well.
- Candy eyeballs: The star decoration that brings these mummy brownies to life. I find you can buy these at most craft or baking stores during the Halloween season.
Variations
I love that you can tweak this Mummy Brownies for Halloween Recipe in little ways to suit your taste or dietary needs. Adding your own twist makes it feel even more special.
- Using gluten-free brownies: I’ve swapped in gluten-free brownies before and it works perfectly, so no one has to miss out on the fun.
- Spiced cream cheese icing: For a fall twist, I sometimes add a pinch of cinnamon or pumpkin pie spice to the cream cheese mixture. It adds great warmth to the flavor.
- Dairy-free option: Try vegan cream cheese and plant-based butter for a dairy-free version that still looks just as cute and tastes delicious.
- Mini mummy brownies: If you want bite-sized treats, cut brownies into smaller squares and use mini candy eyes—they’re perfect for party trays!
How to Make Mummy Brownies for Halloween Recipe
Step 1: Prepare the Cream Cheese “Bandage” Icing
First things first: get your cream cheese and butter soft by leaving them on the counter for about 30 minutes. Then, mix the two together with vanilla extract until the texture is silky and creamy. Slowly add the confectioners sugar to the mix, and keep blending until the icing is smooth and spreadable—but not too runny. This part took me a couple of tries to perfect; too much sugar makes it stiff and too little makes it droopy, so taste and feel your way.
Step 2: Assemble Your Brownies
Lay out your brownies on a flat surface or baking sheet. I recommend using either homemade or a sturdy store-bought kind that won’t crumble easily. This helps when you’re adding the cream cheese “bandages” and candy eyes.
Step 3: Create the Mummy Look
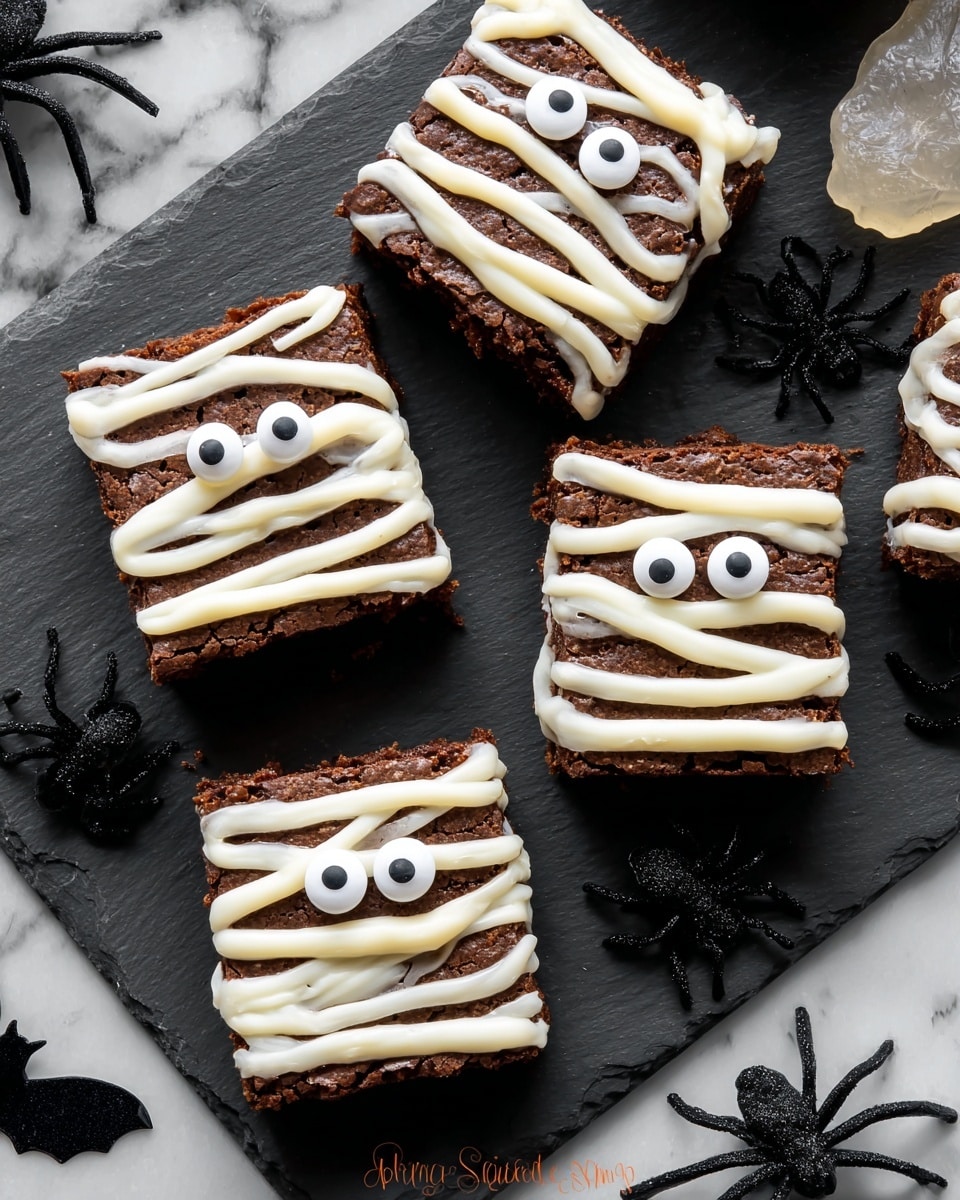
Using a piping bag fitted with a small round tip (or a plastic bag with a tiny corner cut), pipe the cream cheese icing across each brownie in thin, overlapping strips to mimic mummy bandages. The trick I discovered is to keep the squeeze steady and overlap slightly for that authentic wrapped look. Then, gently place two candy eyeballs near the top center of each brownie. It’s so much fun watching the mummies come to life!
Step 4: Chill and Serve
Pop the finished brownies in the fridge for about 30 minutes so the cream cheese icing firms up nicely. This makes it easier to handle and lets the flavors meld. When you’re ready, bring them out, plate them up, and watch the applause start!
Pro Tips for Making Mummy Brownies for Halloween Recipe
- Room Temperature Ingredients: Taking time to soften cream cheese and butter ensures your icing is smooth and easy to pipe every time.
- Use a Piping Bag: I found that piping the bandages is way cleaner and looks more authentic than trying to spread with a knife.
- Overlapping Lines: Don’t be shy about layering the icing strips for that perfect “wrapped mummy” look—it’s okay if it’s a little messy, that’s what makes it cute!
- Eye Placement Matters: Angle the candy eyeballs slightly to give each mummy some personality—and avoid breaking the icing!
How to Serve Mummy Brownies for Halloween Recipe
Garnishes
I usually keep garnishes simple—just a few candy eyeballs are enough to jazz these brownies up. Sometimes I sprinkle a little edible glitter or orange sanding sugar on the plate to add extra Halloween sparkle. It’s those little touches that can thrill your guests without overwhelming the main event.
Side Dishes
These mummy brownies are sweet enough on their own, but I love serving them alongside a scoop of vanilla ice cream or a dollop of whipped cream. For drinks, a spiced pumpkin latte or hot chocolate pairs beautifully and makes your Halloween spread feel extra cozy.
Creative Ways to Present
Once, for a Halloween party, I arranged these mummy brownies on a black platter surrounded by faux spiderwebs and plastic spiders—guests loved the creepy vibe! You can also serve them in mini cupcake liners or on a tiered cake stand decorated with Halloween figurines. Presentation can be half the fun!
Make Ahead and Storage
Storing Leftovers
I store leftover mummy brownies in an airtight container in the refrigerator. The cream cheese icing keeps them moist, and they usually last beautifully for about 3–4 days. Make sure the container isn’t too tight to avoid squishing the delicate icing decoration.
Freezing
If you want to prep early, these mummy brownies freeze well before decorating. I freeze plain brownies wrapped tightly in plastic wrap and foil, then thaw them before piping the icing and adding eyes. Cream cheese icing doesn’t freeze well, so you’ll get the best results fresh. This trick saved me more than once when prepping for parties!
Reheating
Since these are best served cold or at room temperature, I don’t recommend reheating once decorated. If you want them a little softer, take them out of the fridge 15 minutes before serving. Leftover undecorated brownies can be warmed gently in the microwave or oven.
FAQs
-
Can I use homemade brownies instead of store-bought for this Mummy Brownies for Halloween Recipe?
Absolutely! Homemade brownies work fantastic and can even elevate the flavor and texture of your mummy brownies. Just make sure they’re fully cooled before decorating to avoid melting the cream cheese icing.
-
How do I prevent the cream cheese icing from becoming runny?
Using room temperature cream cheese and butter helps, and adding confectioners sugar slowly until you reach a spreadable but thick consistency is key. If it’s too soft, pop the icing in the fridge for a few minutes before piping to firm up.
-
Can I make the Mummy Brownies for Halloween recipe vegan?
Yes, by swapping in vegan cream cheese and plant-based butter, plus using vegan brownies or making your own, you can enjoy a vegan-friendly version without compromising on taste or appearance.
-
What can I use if I can’t find candy eyeballs?
If candy eyeballs are hard to find, you can make eyes using small dots of white icing and a smaller dot of chocolate or black food coloring for pupils. Another fun option is using mini chocolate chips positioned carefully.
Final Thoughts
This Mummy Brownies for Halloween Recipe is honestly one of my favorite last-minute Halloween treats. It’s simple enough to whip up without stress but delivers big on the fun factor. Every year, my family goes crazy for them—they’re the perfect balance of spooky and sweet! So go ahead, gather your ingredients, get creative with those cream cheese bandages, and have a blast making your own festive mummies. Trust me, once you try this, it’ll become a Halloween tradition you’ll look forward to every year!
Print
Mummy Brownies for Halloween Recipe
- Prep Time: 10 minutes
- Cook Time: 0 minutes
- Total Time: 80 minutes
- Yield: 16 brownies
- Category: Dessert
- Method: No-Cook
- Cuisine: American
Description
Celebrate Halloween with these fun and spooky Mummy Brownies featuring rich, fudgy brownies topped with creamy vanilla cream cheese icing and candy eyeballs. Perfect for a festive dessert that’s easy to make using store-bought brownies.
Ingredients
For the Cream Cheese Icing
- 8 oz cream cheese (at room temperature, 1 bar)
- 8 tablespoons unsalted butter (at room temperature, 1/2 cup or 1 stick)
- 1 teaspoon vanilla extract
- 1 cup confectioners sugar
For the Brownies
- 16 brownie pieces (square or round, store-bought or homemade)
- 1 pack candy eyeballs
Instructions
- Prepare the Cream Cheese Icing: In a mixing bowl, combine the softened cream cheese and unsalted butter. Beat them together until the mixture is smooth and creamy. Add the vanilla extract and confectioners sugar, and continue to beat until the icing is fluffy and well blended.
- Apply the Icing: Spread the cream cheese icing in thin lines or strips across the surface of each brownie piece to create a mummy bandage effect.
- Add Candy Eyes: Place two candy eyeballs on each brownie piece on top of the icing bandages to create the look of mummy eyes.
- Chill and Serve: Chill the decorated brownies in the refrigerator for about 30 minutes to allow the icing to set. Serve chilled or at room temperature for a spooky Halloween treat.
Notes
- Rich, fudgy brownies dress up for Halloween in this easy and fun Mummy Brownies recipe.
- Using store-bought brownies makes this recipe quick and simple.
- Ensure cream cheese and butter are at room temperature for smooth icing.
- Store leftovers in an airtight container in the refrigerator for up to 3 days.
Nutrition
- Serving Size: 1 brownie
- Calories: 134 kcal
- Sugar: 8 g
- Sodium: 99 mg
- Fat: 11 g
- Saturated Fat: 6 g
- Unsaturated Fat: 4 g
- Trans Fat: 0 g
- Carbohydrates: 9 g
- Fiber: 1 g
- Protein: 1 g
- Cholesterol: 31 mg


