
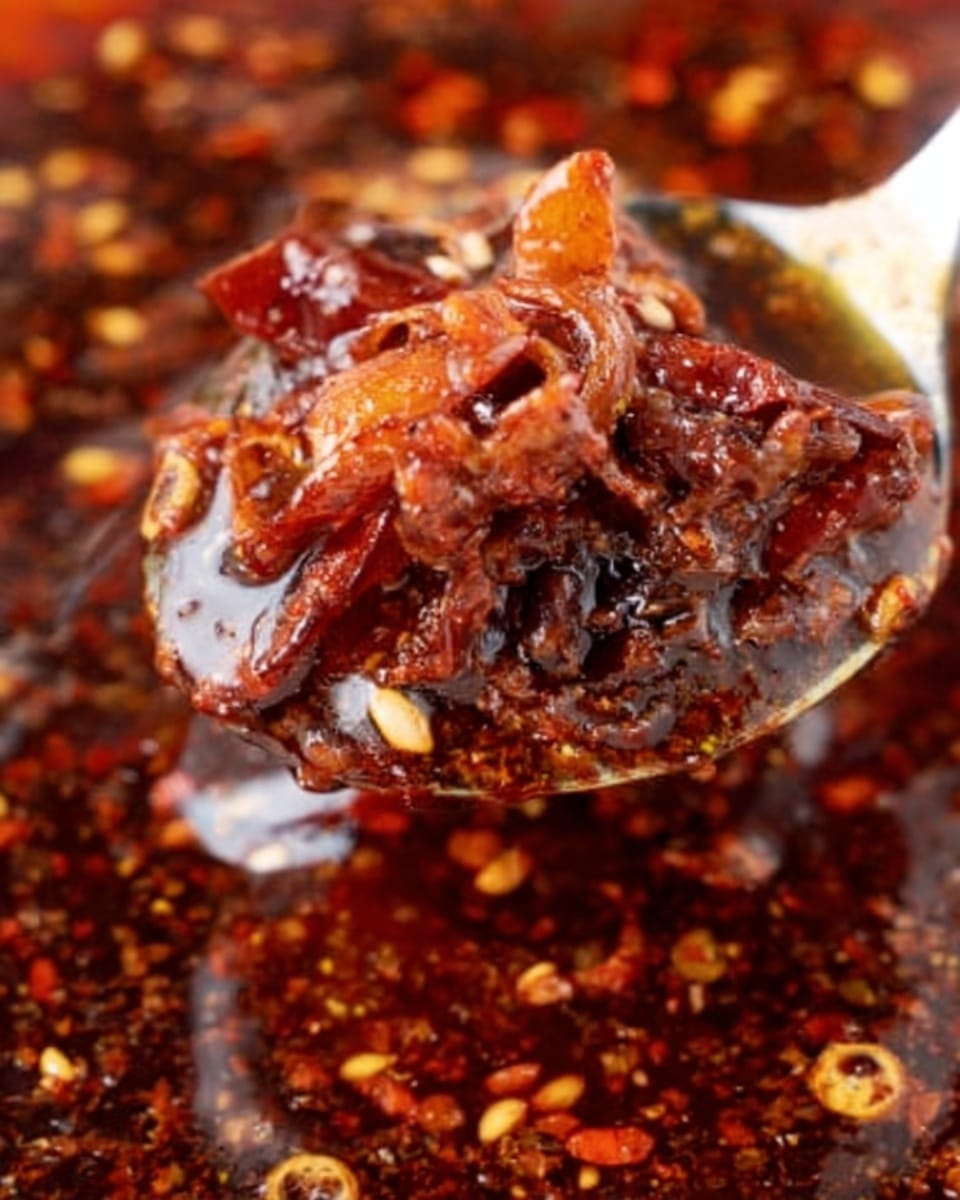
I absolutely love making this Homemade Chili Crisp Recipe because it adds that perfect kick of heat combined with an irresistible crunch. Whether you’re drizzling it over steamed vegetables, stirring it into noodles, or just spooning it on plain rice, it transforms any meal into something extraordinary. I first stumbled upon this recipe when craving a chili oil that wasn’t just fiery but also had texture that made every bite exciting.
This Homemade Chili Crisp Recipe works amazingly well whenever you want to elevate simple dishes without too much fuss. Plus, it keeps well and is super versatile, so you’ll find yourself reaching for it regularly once you’ve tried it. The blend of aromatic garlic, shallots, and Szechuan chili flakes in this recipe is seriously next level—and I can’t wait for you to discover it too!
Why You’ll Love This Recipe
- Crunchy Texture: The fried garlic and shallots add an addictive crunch that sets it apart from regular chili oils.
- Balanced Heat: The Szechuan chili flakes deliver spice without overpowering, making it perfect for many dishes.
- Easy to Customize: You can tweak the salt and soy sauce to match your taste, giving you full control over flavor.
- Long-Lasting: Once made, it keeps beautifully in the fridge for weeks, so you always have flavor on hand.

Ingredients You’ll Need
I’ve found that using fresh shallots and garlic really makes this Homemade Chili Crisp Recipe shine, giving it that authentic deep flavor. The Szechuan chili flakes are key for the right kind of heat, so try to grab good-quality ones if you can.
- Neutral oil: Choose a light oil like canola or vegetable — it won’t affect the flavor and can withstand high heat.
- Shallots: Thinly sliced for maximum crispiness and aromatic sweetness.
- Garlic: Also sliced thin to fry up beautifully without burning.
- Szechuan chili flakes: The soul of this recipe, offering that tongue-tingling heat and vibrant red color.
- Sesame seeds: Toasted for a nutty crunch that complements the other textures.
- Salt: For seasoning and balancing the heat and oiliness.
- Sugar: Just a touch to mellow out the chili’s fire and enhance depth.
- Soy sauce: I like the umami it adds—it deepens the flavor and adds a little savory saltiness.
- Sesame oil: Finishing oil that gives a wonderful toasted aroma and richness.
Variations
One of the fun parts about this Homemade Chili Crisp Recipe is making it your own. I’ve played around with adding different nuts or even changing up the chili flakes to switch the heat profile, and you can totally do that too!
- With toasted nuts: I once threw in some toasted peanuts for extra crunch and smoky flavor—it was a hit at our dinner party.
- Extra spicy: For those who love heat, try adding a bit of crushed Szechuan peppercorns to give it that numbing kick.
- Garlic-free version: If garlic isn’t your thing, swapping it with extra shallots still keeps that crunchy texture and aroma.
- Oil substitution: Avocado oil can be a great alternative if you want a lighter taste but still need a high smoke point.
How to Make Homemade Chili Crisp Recipe
Step 1: Fry the Shallots and Garlic to Golden Perfection
Heat your neutral oil in a saucepan over medium-high heat. Add the thinly sliced garlic and shallots to the hot oil. You’ll see them bubble and gently sizzle — keep an eye on them because you want them pale golden, not burnt. This usually takes about 3-5 minutes. Once they’re done, use a slotted spoon to remove the shallots and garlic, letting them drain on paper towels. Strain the oil to remove any bits and save it for the next step.
Step 2: Prepare the Chili Flake Mixture
In a large heatproof bowl, combine the Szechuan chili flakes, salt, sugar, and sesame seeds. Mixing the dry ingredients first helps spread the flavors evenly once the hot oil hits them. This is where the magic starts!
Step 3: Pour Hot Oil Over the Chili Mixture
Heat the strained oil back on the stove until it reaches around 350-375°F (175-190°C). If you don’t have a thermometer, heat until you see slight ripples rising from the oil but before it smokes. Carefully and slowly pour the oil over the chili flake mixture—this is the moment when it sizzles and lifts all those incredible aromas. Stir gently but quickly to combine everything.
Step 4: Add Soy Sauce, Sesame Oil, and Crispy Bits
Once the oil and chili flakes are well mixed, stir in the soy sauce and sesame oil for that final boost of flavor and aroma. Then toss in the crispy fried shallots and garlic from earlier, folding everything together so you get spicy, savory, and crunchy in every bite. Let it cool before storing.
Pro Tips for Making Homemade Chili Crisp Recipe
- Maintain the Right Oil Temperature: Make sure your oil is hot enough before pouring it over the chili flakes to unlock the best flavor without burning.
- Use Thin Slices: Thinly slicing garlic and shallots ensures they crisp up perfectly rather than getting soggy or burnt.
- Store in a Clean Jar: I always use a sterilized glass jar to keep the chili crisp fresh and prevent contamination.
- Avoid Overcooking Aromatics: Patience here pays off—golden, not brown, maximizes crunch and prevents bitterness.
How to Serve Homemade Chili Crisp Recipe
Garnishes
My go-to garnish with this chili crisp is a simple sprinkle of chopped scallions and maybe a few toasted sesame seeds for extra nuttiness. The fresh scallions bring a brightness that balances the rich, spicy crunch.
Side Dishes
I love pairing this chili crisp with steamed white rice, stir-fried noodles, or even roasted vegetables. It’s also fantastic spooned over soft tofu or drizzled on dumplings for an instant flavor upgrade that will have you craving more.
Creative Ways to Present
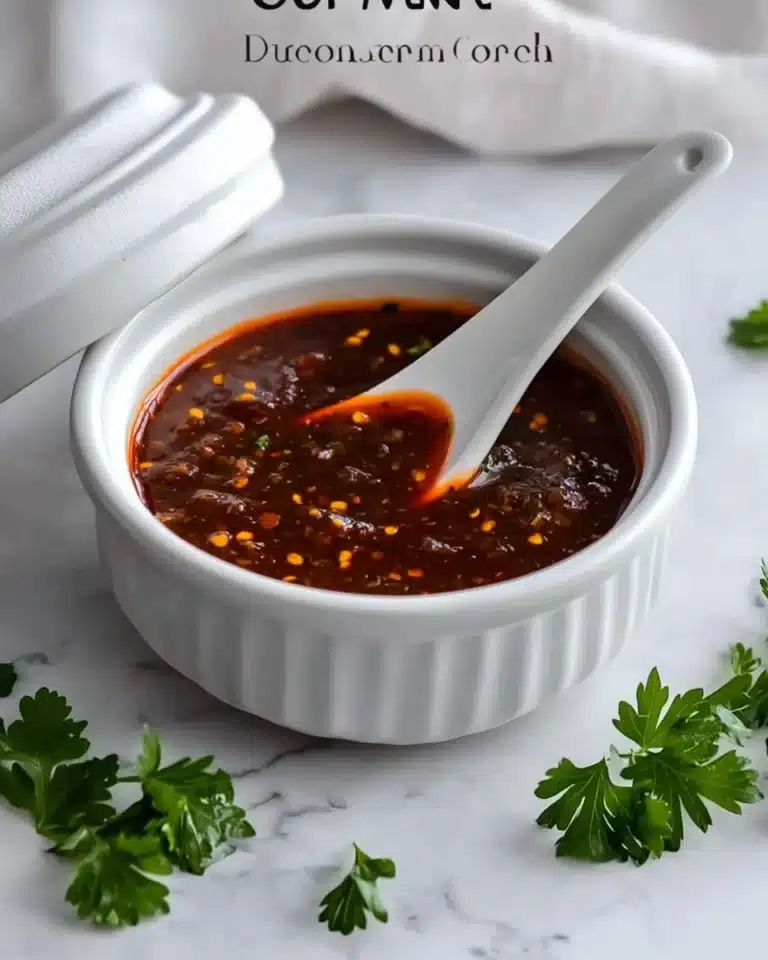
For special occasions, I like to serve this Homemade Chili Crisp Recipe in small dipping bowls alongside a spread of appetizers—crispy wontons, cucumber slices, and spring rolls all become irresistible when paired with it. You could even use it as a topping for avocado toast or mix it into mayo for a spicy sandwich spread!
Make Ahead and Storage
Storing Leftovers
I store my Homemade Chili Crisp Recipe in a clean, airtight jar in the fridge. It stays fresh and crunchy for up to a month, though I have to admit it usually disappears well before then in my kitchen! Always check for any off smells or mold, but if stored properly, it’s super sturdy.
Freezing
Because of the oil content, I haven’t tried freezing chili crisp myself—the texture might change and the oil could separate. I’d recommend making smaller batches as needed to keep it fresher and at its best.
Reheating
This chili crisp is best served at room temperature or straight from the jar, so I don’t usually reheat it. If you do want a warm drizzle, just gently warm a small portion in a pan—it revives the flavors without sacrificing that amazing crunch.
FAQs
-
What is the difference between chili crisp and chili oil?
Great question! Chili crisp differs from chili oil mainly because it contains crispy bits like fried garlic and shallots, adding a crunchy texture. Chili oil tends to be more of a flavored oil without those crunchy components. The homemade chili crisp recipe combines the heat and aroma of chili oil with those delightful crispy bits that make eating it a truly textural experience.
-
Can I use a different type of chili flakes?
Absolutely! While Szechuan chili flakes give that signature tingly heat, you can experiment with other chili flakes based on your heat preference. Just keep in mind the flavor and spice level may vary. Start with smaller amounts if trying a spicier chili to avoid accidentally overpowering the balance.
-
How long does homemade chili crisp last?
Stored properly in the fridge in an airtight container, this chili crisp can last up to a month. The oil preserves the ingredients well, but for best flavor and crunch, try to use it within that time. Always check for any changes in aroma or appearance before use.
-
Is chili crisp vegan?
Yes, this Homemade Chili Crisp Recipe as written is vegan since it contains no animal products. Just be sure the soy sauce you use is vegan-friendly, and you’re good to go!
-
Can I make this recipe less spicy?
You sure can! Simply reduce the amount of chili flakes, or try mixing the chili flakes with some mild paprika or smoked chili powder to keep depth without all the heat. Adjust the salt and sugar to keep the balance intact.
Final Thoughts
This Homemade Chili Crisp Recipe has found a special place in my kitchen and heart—it’s my secret weapon for making everyday meals exciting. I love that it’s easy to whip up but feels like a gourmet addition, and I know you’ll feel the same once you taste it. Give it a try, customize it to suit your palate, and watch all your dishes come alive with flavor and crunch. Trust me, once you start making your own, store-bought chili crisp will feel like a distant memory!
Print
Homemade Chili Crisp Recipe
- Prep Time: 5 minutes
- Cook Time: 10 minutes
- Total Time: 15 minutes
- Yield: About 50 servings (1 teaspoon per serving)
- Category: Condiment
- Method: Frying
- Cuisine: Chinese
Description
This Homemade Chili Crisp recipe offers a flavorful and crunchy condiment combining fragrant garlic, shallots, and Szechuan chili flakes in a rich, aromatic oil. Perfect for adding heat, texture, and umami to any dish, this chili crisp is a versatile staple for lovers of spicy food seeking a delightful crunch.
Ingredients
Oil and Aromatics
- 3 cups neutral oil (such as vegetable or canola oil)
- 2 large shallots, thinly sliced
- 12 cloves garlic, thinly sliced
Chili and Seasonings
- 1.5 cups Szechuan chili flakes
- 1 tbsp sesame seeds
- 1/2 tbsp salt
- 1/2 tbsp sugar
- 2 tbsp soy sauce
- 1/2 tbsp sesame oil
Instructions
- Heat Oil with Aromatics: Add the neutral oil to a saucepan and place over high heat. Add the sliced garlic and shallots to the hot oil. Cook, stirring occasionally, until the garlic and shallots become bubbling and pale golden brown, about 5-7 minutes. Remove from heat and strain the oil, reserving both the oil and crispy garlic and shallots.
- Prepare Chili Mixture: In a large heatproof bowl, combine the Szechuan chili flakes, salt, sugar, and sesame seeds. Stir them together to mix evenly.
- Heat Oil to Fry Chili Flakes: Return the strained oil to the saucepan and heat it to between 350°F and 375°F (175°C to 190°C). Once the oil reaches this temperature, carefully pour the hot oil over the chili flake mixture. Stir well to integrate the flavors and toast the chili flakes, releasing their aroma.
- Season and Finish: Add the soy sauce and sesame oil to the mixture. Toss in the reserved crispy garlic and shallots. Stir everything thoroughly to combine all the ingredients and distribute the crunchy textures evenly.
- Serve and Enjoy: Allow the chili crisp to cool to room temperature. Use it as a condiment on rice, noodles, dumplings, vegetables, or any dish that benefits from spicy, crunchy flavor.
Notes
- Chili Crisp offers a fantastic crunchy texture and intense flavor compared to regular chili oil, featuring crispy fried garlic and shallots.
- Store in an airtight container at room temperature for up to 2 weeks to maintain its freshness and crunch.
- Adjust the amount of chili flakes to control the heat level according to your preference.
- Use neutral oil with a high smoke point for best frying results.
Nutrition
- Serving Size: 1 teaspoon (about 5g)
- Calories: 40 kcal
- Sugar: 0.1 g
- Sodium: 110 mg
- Fat: 4.5 g
- Saturated Fat: 0.7 g
- Unsaturated Fat: 3.6 g
- Trans Fat: 0 g
- Carbohydrates: 0.4 g
- Fiber: 0.04 g
- Protein: 0.1 g
- Cholesterol: 0 mg


