
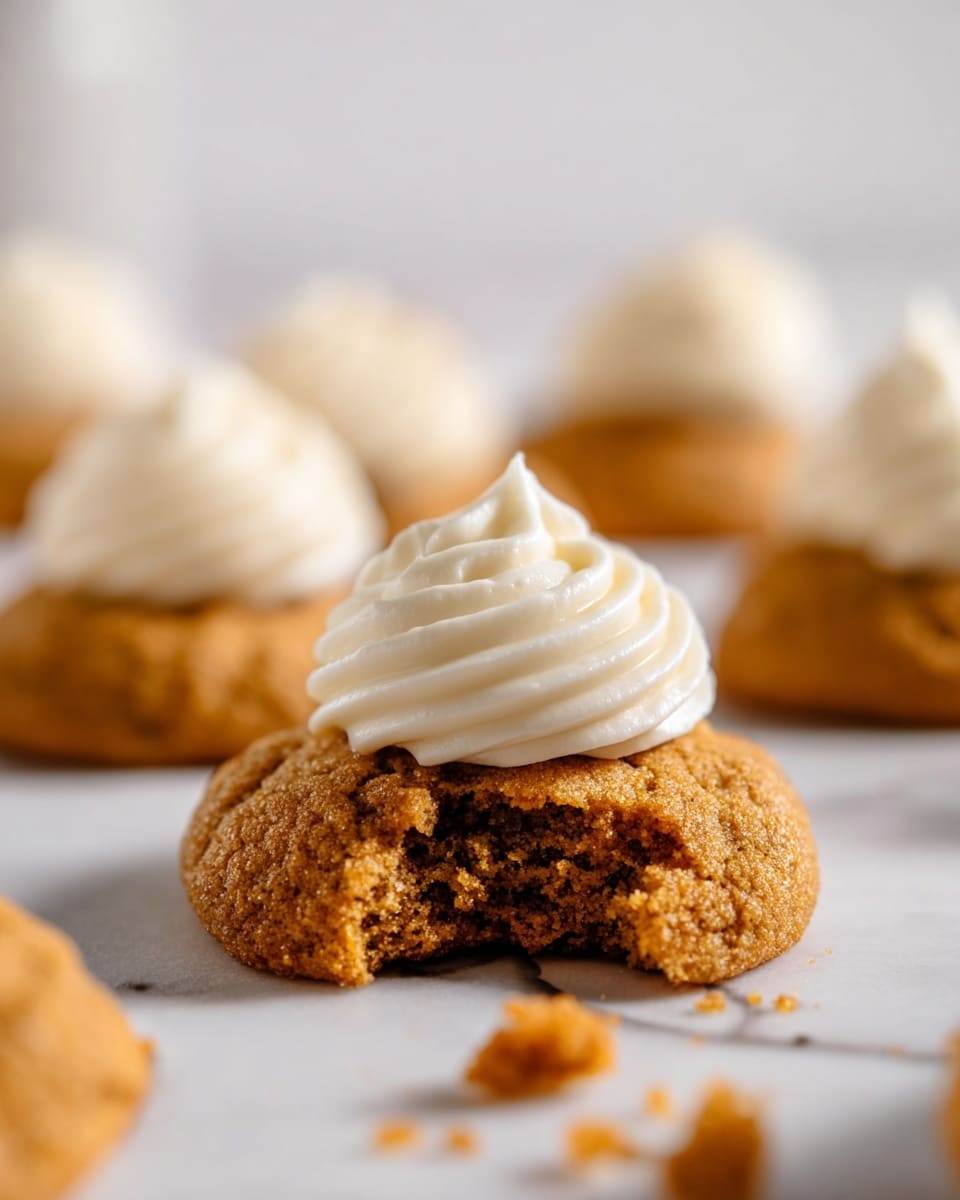
I absolutely love sharing this Easy Cheesecake Filled Pumpkin Thumbprint Cookies Recipe with you because it combines two of my favorite fall treats into one bite-sized delight. The soft, spiced pumpkin cookie with that luscious cheesecake filling? It’s honestly a game-changer and perfect for cozy afternoons or holiday cookie exchanges. When I first tried this recipe, I was amazed at how simple it was to pull off such a beautiful, bakery-style cookie right in my own kitchen.
You’ll find that these cookies aren’t just delicious—they’re also super fun to make, especially if you want to impress guests without stressing out. The pumpkin flavor feels warm and seasonal, while the creamy filling adds that special sweet surprise that everyone goes crazy for. Whether you’re baking for family, friends, or just treating yourself, this Easy Cheesecake Filled Pumpkin Thumbprint Cookies Recipe is absolutely worth giving a try.
Why You’ll Love This Recipe
- Perfect Fall Flavor: The warm spices and pumpkin puree make every cookie taste like autumn in a bite.
- Simple Yet Elegant: With just a few pantry staples, you’ll create a stunning cookie that looks like it took hours to make.
- Fun to Make and Fill: Pressing the thumbprint and filling the cookies adds a hands-on element that’s great for baking with family or friends.
- Versatile Sweet Treat: These cookies can be dressed up with various toppings or kept classic for any occasion.

Ingredients You’ll Need
Each ingredient in this Easy Cheesecake Filled Pumpkin Thumbprint Cookies Recipe plays a role in creating that perfect balance between soft, spiced cookie and creamy filling. Be sure to use fresh spices for the best aroma and pumpkin puree (not pumpkin pie filling) for the right texture.
- All-purpose flour: This gives structure to the cookie; measuring carefully will keep the cookies tender, not dry.
- Cinnamon, nutmeg, ginger: Warm spices that bring out that cozy pumpkin vibe.
- Baking soda: Helps the cookies rise slightly for a soft, cakey texture.
- Salt: Balances the sweetness and enhances flavors.
- Butter (softened): Use unsalted and room temperature for easier mixing and a creamy dough.
- Brown sugar and white sugar: Brown sugar adds moisture and depth, while white sugar adds crispness.
- Egg: Binds everything together and adds richness.
- Vanilla extract: Adds warmth and rounds out the flavor profile.
- Pumpkin puree: Be sure it’s pure pumpkin, not pumpkin pie mix, to control sweetness and spice.
- Butter and cream cheese (softened): These create the smooth cheesecake filling—make sure they’re at room temperature for easy mixing.
- Powdered sugar: Sweetens and gives that silky texture to the filling.
Variations
I love how versatile this Easy Cheesecake Filled Pumpkin Thumbprint Cookies Recipe is—once you get comfortable with the base, feel free to tweak the filling or spices. Making it your own is part of the fun, and sometimes I enjoy swapping the filling with cinnamon cream cheese or adding a little maple syrup for extra sweetness.
- Spiced Filling: Adding a pinch of cinnamon or pumpkin pie spice to the cheesecake filling gives an extra cozy flavor—I tried this on a whim and my family couldn’t get enough.
- Nutty Twist: Sprinkle chopped pecans or walnuts on the filling while it’s still wet for crunch and texture.
- Gluten-Free Option: Use a gluten-free flour blend in place of all-purpose flour with no changes needed.
- Chocolate Drizzle: Drizzling melted dark chocolate over the cooled cookies makes them look fancy and adds a rich depth.
How to Make Easy Cheesecake Filled Pumpkin Thumbprint Cookies Recipe
Step 1: Mix the Dry Ingredients with Warm Spices
Start by combining your all-purpose flour, cinnamon, nutmeg, ginger, baking soda, and salt in a small bowl. This blend of spices really makes the pumpkin flavor sing in the cookie. Mixing them first ensures your dough will have an even flavor and prevents clumps.
Step 2: Cream Butter and Sugars Until Fluffy
In a larger bowl, beat softened butter with both brown and white sugar until the mixture is light and fluffy. I like to use a handheld mixer for this to save time, but a sturdy whisk or wooden spoon works too. The fluffier the mixture, the more tender your cookies will be.
Step 3: Incorporate Egg, Vanilla, and Pumpkin Purée
Beat in the egg first, then add the vanilla extract and pumpkin purée, mixing fully after each addition. This helps everything blend smoothly and keeps your dough uniform. When I forgot to mix between additions once, my dough looked uneven—definitely something to watch out for.
Step 4: Add Dry Ingredients and Combine
Slowly stir the flour and spice mixture into the wet ingredients. Don’t overmix here; just combine until the dough comes together. The texture should be soft but not sticky—if it’s too wet, a tablespoon or two more flour can help.
Step 5: Bake and Press Your Thumbprint
Drop tablespoon-sized scoops of dough onto a parchment-lined baking sheet and bake at 350ºF for about 10 minutes, or until the edges are set but not browned. The cookies will still look soft—that’s perfect. As soon as they come out of the oven, press the back of a spoon gently into the center of each cookie to make a shallow well. This is important because the cookies firm up as they cool, making it harder to create the thumbprint later.
Step 6: Prepare Your Cream Cheese Filling
While the cookies cool completely, beat together softened butter, cream cheese, powdered sugar, and vanilla extract until smooth and creamy. Using ingredients at room temperature ensures the filling will be silky without lumps—this is a trick I learned from my cheesecake adventures!
Step 7: Fill Your Cookies and Add Finishing Touches
Once your pumpkin cookies are fully cooled, use a piping bag with a star tip (or a small plastic bag with the corner snipped off) to fill each thumbprint with the cheesecake mixture. I love swirling the filling as I pipe to create those cute little peaks. If you want to get creative, sprinkle chopped nuts, mini chocolate chips, or a dusting of cinnamon on top while the filling is still soft.
Pro Tips for Making Easy Cheesecake Filled Pumpkin Thumbprint Cookies Recipe
- Softened Ingredients Matter: Always let butter and cream cheese come to room temperature for the smoothest dough and filling.
- Press Thumbprints Right Away: Make sure to create the thumbprint immediately after baking so your cookies won’t crack or break.
- Use Parchment Paper: It prevents sticking and helps your cookies bake evenly without spreading too much.
- Don’t Overbake: Cookie centers should stay soft. Overbaking leads to dry cookies that won’t hold the filling nicely.
How to Serve Easy Cheesecake Filled Pumpkin Thumbprint Cookies Recipe
Garnishes
I usually keep garnishes simple because the cookie and filling already shine, but I love adding a light dusting of cinnamon or a few finely chopped toasted pecans on top. Sometimes a little drizzle of caramel or dark chocolate adds that stunning finish for special occasions. These quick touches make the cookies look extra inviting without extra fuss.
Side Dishes
These pumpkin thumbprint cookies pair wonderfully with a hot cup of chai tea or coffee—perfect for cozy Sunday mornings. If you’re hosting a party, they’re great alongside spiced cider or even a glass of milk for kids and adults alike.
Creative Ways to Present
For holiday gatherings, I like to arrange these cookies on a rustic wooden tray with autumn leaves or mini pumpkins scattered around for a festive vibe. Another fun idea is using a tiered dessert stand and alternating rows of these with plain pumpkin cookies for a pretty display that guests always compliment.
Make Ahead and Storage
Storing Leftovers
I keep leftover cookies in an airtight container in the fridge to keep the cheesecake filling fresh and creamy. They last beautifully for up to 4 days—perfect for enjoying a little treat throughout the week without losing that fresh-baked flavor.
Freezing
If you want to freeze these cookies, I recommend freezing the plain pumpkin cookies first, then filling them after thawing. The cheesecake filling can be frozen separately in an airtight container for up to a month. This two-step method keeps your cookies from becoming soggy.
Reheating
When reheating, bring your filled cookies to room temperature for best texture. If you need to warm the plain cookies before filling, just a few seconds in the microwave makes them soft and freshly baked again. Avoid reheating the filled cookies as the cream cheese can melt and lose its shape.
FAQs
-
Can I use canned pumpkin pie filling instead of pure pumpkin?
I recommend using pure pumpkin puree, not pumpkin pie filling, because canned pumpkin pie filling already has added sugars and spices that can throw off the taste and texture of the cookies. Pure pumpkin gives you control over flavor and sweetness.
-
Do I need a piping bag to fill the thumbprints?
Not at all! If you don’t have a piping bag, you can fill a small plastic sandwich bag with the cheesecake filling, twist the end to prevent air bubbles, and snip a tiny hole in the corner to pipe the filling easily. This DIY method creates a nice swirl effect if you move your hand in a circular motion.
-
Can I make these cookies vegan or dairy-free?
You can make a vegan version by using dairy-free butter and cream cheese substitutes, and an egg replacer like flax egg or commercial alternatives. Keep in mind that texture and flavor may differ a bit, but it’s definitely doable!
-
What’s the best way to prevent the cookies from cracking when making the thumbprints?
Press the thumbprints immediately after baking while the cookies are still warm and soft. Using a spoon or your thumb gently, don’t press too hard or the cookie might break. Let the cookies cool fully before filling to keep everything intact.
-
How long do these cookies last?
Stored in an airtight container in the fridge, the filled cookies stay fresh for about 4 days. Beyond that, they might start to dry out or the filling can lose its creamy texture.
Final Thoughts
This Easy Cheesecake Filled Pumpkin Thumbprint Cookies Recipe has become one of my go-to treats during the cooler seasons because it’s both comforting and impressive without hours of work. I love how it brings smiles at every gathering, and I bet once you try it, you’ll feel the same way. Give this recipe a shot—you might even find it becoming a new family favorite just like it did for mine!
Print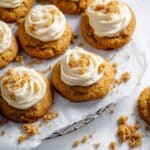
Easy Cheesecake Filled Pumpkin Thumbprint Cookies Recipe
- Prep Time: 15 minutes
- Cook Time: 10 minutes
- Total Time: 25 minutes
- Yield: 21 cookies
- Category: Dessert
- Method: Baking
- Cuisine: American
Description
These easy cheesecake-filled pumpkin thumbprint cookies combine soft, spiced pumpkin-flavored cookie dough with a creamy vanilla cheesecake filling. Perfect for autumn and holiday gatherings, these delightful treats offer a tender bite filled with luscious cream cheese icing and a hint of warm spices.
Ingredients
For the cookies:
- 1 1/4 cups all-purpose flour
- 1 teaspoon ground cinnamon
- 1/4 teaspoon ground nutmeg
- 1/4 teaspoon ground ginger
- 1/2 teaspoon baking soda
- 1/4 teaspoon salt
- 1/2 cup unsalted butter, softened
- 1/4 cup packed brown sugar
- 1/4 cup white sugar
- 1 large egg
- 1/2 teaspoon vanilla extract
- 1/2 cup pumpkin puree
For the filling:
- 2 tablespoons unsalted butter, softened
- 4 tablespoons cream cheese (2 oz), at room temperature
- 1 cup powdered sugar
- 1/2 teaspoon vanilla extract
Instructions
- Preheat the oven: Set your oven to 350ºF (175ºC) so it’s ready for baking the cookies.
- Mix dry ingredients: In a small bowl, combine the all-purpose flour, cinnamon, nutmeg, ginger, baking soda, and salt. Set this mixture aside.
- Cream butter and sugars: Using a large mixing bowl, beat the softened butter with both brown and white sugars until the texture becomes light and fluffy, which usually takes a few minutes.
- Add wet ingredients: Beat in the egg, followed by the vanilla extract and pumpkin puree, ensuring each ingredient is fully incorporated before adding the next.
- Combine flour mixture: Stir the dry ingredients into the wet mixture until everything is fully mixed into a consistent cookie dough.
- Form cookie dough balls: Drop tablespoon-sized portions of dough onto a parchment-lined baking sheet, spacing them evenly.
- Bake the cookies: Place the tray in the center of the preheated oven and bake for 10 minutes or until the cookies are firm but not browned.
- Create thumbprints: Immediately after taking the cookies out of the oven, press a thumbprint in the center of each cookie using the back of a teaspoon or the end of a wooden spoon. This creates a well for the filling.
- Cool cookies: Allow the cookies to cool completely on the baking sheet before adding the filling to prevent melting or sliding.
- Prepare the cheesecake filling: While cookies cool, beat together the softened butter, cream cheese, powdered sugar, and vanilla extract until smooth and creamy.
- Fill the thumbprints: Using a piping bag fitted with a star tip, carefully pipe the cream cheese filling into each cooled cookie indentation. Alternatively, use a small plastic bag with the tip cut off if a piping bag is unavailable.
- Add toppings (optional): Sprinkle any optional toppings onto the moist filling immediately after piping to decorate or add extra texture.
Notes
- If you don’t have a piping bag, place the filling in a small plastic sandwich bag, twist to close, cut a tiny corner, and gently squeeze to pipe the filling into the cookie centers.
- Moving your hand quickly in a circular motion while piping creates a pretty swirl pattern on top of the filling.
- Ensure cookies are completely cooled before filling to avoid melting the cheesecake mixture.
- For extra flavor, consider adding chopped nuts or a sprinkle of cinnamon on top of the filling before it sets.
Nutrition
- Serving Size: 1 cookie
- Calories: 92 kcal
- Sugar: 11 g
- Sodium: 81 mg
- Fat: 2 g
- Saturated Fat: 1 g
- Unsaturated Fat: 0.5 g
- Trans Fat: 0.05 g
- Carbohydrates: 17 g
- Fiber: 0.4 g
- Protein: 1 g
- Cholesterol: 13 mg


