
Let me share with you one of my all-time favorite discoveries in the kitchen: this delightful Air Fryer Honey Garlic Chicken Thighs Recipe. It’s the perfect blend of sweet and savory, with golden crispy edges and tender juicy meat inside that makes every bite absolutely irresistible. Trust me, once you try this, your weeknight dinners will never be the same. Stick around, and I’ll guide you through all the tasty details and handy tips so you can nail this at home with ease.
Why You’ll Love This Recipe
- Effortless Cooking: The air fryer does most of the work for crispy, juicy thighs without the mess.
- Flavor Explosion: The honey garlic sauce brings the perfect balance of sweet and savory.
- Quick Weeknight Meal: Ready in under 30 minutes, making dinner easy on busy nights.
- Family Favorite: My family can’t get enough of this recipe — it always disappears fast!

Ingredients You’ll Need
Getting the flavor right here is key, and luckily, the ingredients come together beautifully with no complicated steps. Most of these staples you probably already keep in your kitchen, making it super convenient to whip up anytime.
- Chicken thighs: I always go for bone-in, skin-on for the juiciest meat and crispiest skin.
- Honey: This adds that lovely caramelized sweetness that clings perfectly to the chicken.
- Garlic cloves: Fresh garlic makes a huge difference compared to pre-minced; it’s so much more vibrant.
- Soy sauce: Brings that umami depth to balance out the sweetness of honey.
- Apple cider vinegar: Adds a subtle tang that brightens the whole dish.
- Olive oil: Helps to crisp up the thighs in the air fryer without drying them out.
- Salt & pepper: Simple, but crucial for seasoning.
- Optional chili flakes: For a little heat if you like your meals with a kick.
Variations
I love how versatile this Air Fryer Honey Garlic Chicken Thighs Recipe is. You can easily tweak it to fit your cravings or dietary preferences — and trust me, experimenting here is half the fun!
- Spicy Twist: Adding chili flakes or a dash of sriracha to the sauce is something I do whenever I want an extra zing that my family really enjoys.
- Gluten-Free Option: Swap out regular soy sauce for tamari to keep it gluten-free without sacrificing flavor.
- Herb Boost: Toss in fresh rosemary or thyme before air frying for a fragrant boost that’s especially great in cooler months.
- Sticky Glaze: For a thicker sauce, reduce honey slightly and add a splash of water mixed with cornstarch after cooking — I’ve found this step impresses guests every time.
How to Make Air Fryer Honey Garlic Chicken Thighs Recipe
Step 1: Prepare the Chicken
Start by patting your chicken thighs dry with paper towels—this helps the skin get extra crispy in the air fryer. Then season them generously with salt and pepper. I usually let them rest for 10 minutes while I prep the sauce; this step really helps lock in the flavor and moisture.
Step 2: Mix Your Honey Garlic Sauce
Whisk together honey, soy sauce, minced garlic, apple cider vinegar, and olive oil until well combined. This combo creates that beautiful balance of sweet, tangy, and savory that clings to every crispy bite of chicken. If you love a bit of heat like me, toss in some chili flakes now!
Step 3: Air Fry the Chicken Thighs
Place the chicken thighs skin-side down in your air fryer basket without crowding. Cook at 360°F for about 12 minutes, then flip and brush generously with that glorious honey garlic sauce. Cook for another 8-10 minutes or until the internal temperature hits 165°F and the skin is beautifully crispy. Don’t skip flipping and saucing part—this is where the magic really happens!
Step 4: Glaze and Finish
Once cooked, give the chicken a final brush of the sauce and pop it back into the air fryer for 2-3 minutes to set the glaze. It caramelizes just so, giving you that finger-licking sticky finish you’ll want to savor with every bite.
Pro Tips for Making Air Fryer Honey Garlic Chicken Thighs Recipe
- Dry the Skin Thoroughly: Moisture is the enemy of crispiness, so be sure to dry those thighs well before air frying.
- Don’t Overcrowd the Basket: Giving each piece room means even cooking and maximum crispness.
- Use a Meat Thermometer: This helped me avoid overcooking and guaranteed tender, juicy results every time.
- Sauce After Flipping: Applying the honey garlic sauce after you flip ensures the skin stays crispy instead of soggy.
How to Serve Air Fryer Honey Garlic Chicken Thighs Recipe
Garnishes
I always sprinkle fresh chopped parsley or green onions right before serving—it adds such a fresh, vibrant pop of color and flavor that balances the rich glaze beautifully. A few toasted sesame seeds sprinkled on top are a nice touch, too!
Side Dishes
When I make this recipe, I often pair it with creamy mashed cauliflower or buttery garlic green beans for a wholesome, low-carb meal. A simple steamed jasmine rice or quinoa works equally well if you prefer grains. Roasted veggies on the side round things out perfectly.
Creative Ways to Present
For a special dinner, I’ve plated these thighs over a bed of coconut rice and garnished with slices of fresh red chili and lime wedges—it’s a crowd-pleaser every time. Serving family-style on a large platter with dips like a garlicky yogurt sauce elevates it to party-worthy status.
Make Ahead and Storage
Storing Leftovers
I usually store any leftover chicken in an airtight container in the fridge for up to 3 days. Pro tip: Let the chicken cool completely before sealing it up to avoid sogginess from trapped steam.
Freezing
This recipe freezes beautifully. After cooling, individually wrap each thigh in foil or plastic wrap, then pop them in a freezer bag. They keep well for up to 2 months—perfect for prepping ahead.
Reheating
To reheat, I recommend popping the chicken in the air fryer at 350°F for about 5-7 minutes—this helps maintain that crispy skin and warm, juicy meat. Microwaving tends to make the skin rubbery, so I avoid that when possible.
FAQs
-
Can I use boneless chicken thighs instead of bone-in?
Absolutely! Boneless thighs cook faster, so reduce the cooking time by a few minutes and keep an eye on them to avoid drying out. The flavor from the honey garlic sauce is just as delicious.
-
Is this recipe keto-friendly?
This Air Fryer Honey Garlic Chicken Thighs Recipe is moderately low-carb, but honey does add some sugar. If you’re strictly keto, consider reducing the honey or substituting with a keto-friendly sweetener like erythritol.
-
Can I make the honey garlic sauce ahead of time?
Yes, the sauce can be mixed and stored in the fridge up to 2 days ahead. Just give it a good stir before using, as some ingredients may settle or separate.
-
What if I don’t have an air fryer?
You can bake this in a conventional oven at 400°F on a wire rack set over a baking sheet to help crisp the skin. It will take about 30-35 minutes, flipping halfway through and brushing with sauce as you would in the air fryer.
Final Thoughts
I absolutely love how this Air Fryer Honey Garlic Chicken Thighs Recipe turns out every single time. It’s become my secret weapon for fuss-free dinners that still wow everyone at the table. If you’re craving crispy, juicy chicken with a sticky-sweet garlic glaze that’s just bursting with flavor, give this a go—you’ll be so glad you did. I can’t wait to hear how much your friends and family go crazy for it!
Print
Air Fryer Honey Garlic Chicken Thighs Recipe
- Prep Time: 5 minutes
- Cook Time: 28 minutes
- Total Time: 33 minutes
- Yield: 4 cloud breads
- Category: Bread
- Method: Baking
- Cuisine: American
- Diet: Low Carb
Description
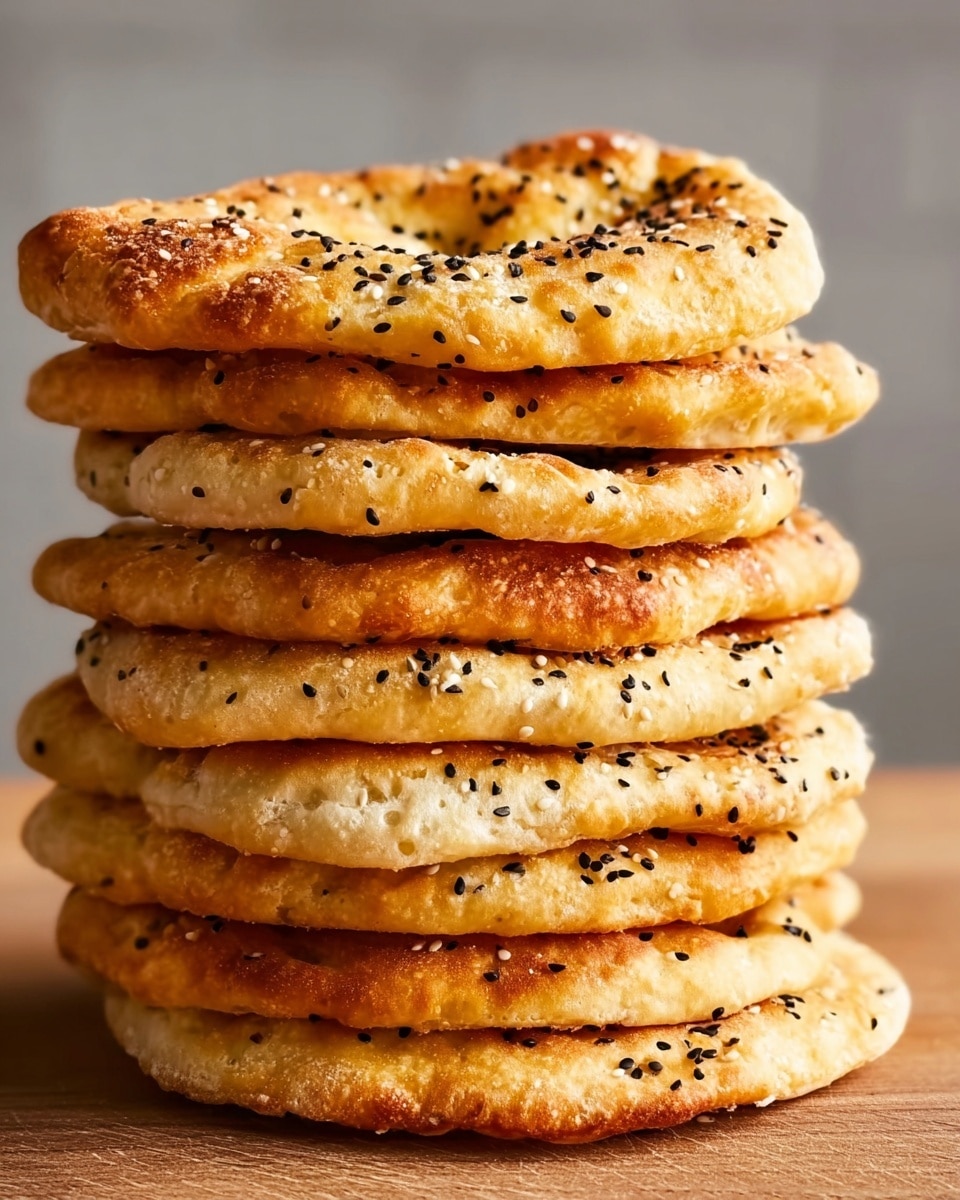
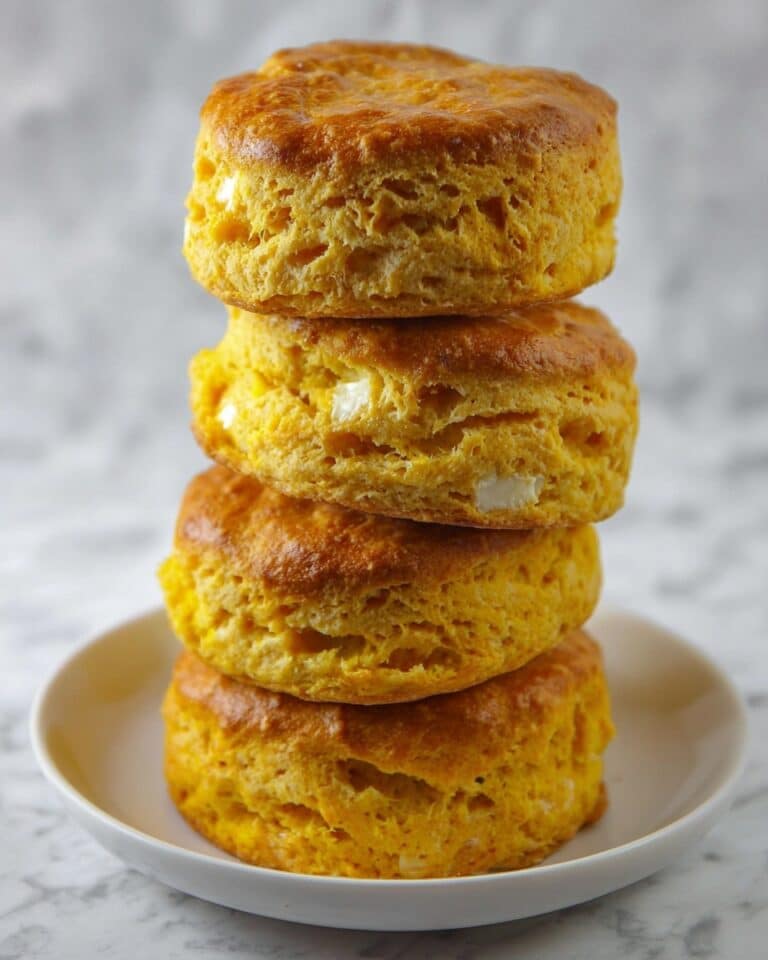
Learn how to make keto-friendly cloud bread that is light, fluffy, and delicious. This recipe uses only a few simple ingredients such as eggs, cream cheese, and seasoning, perfect for those on a low-carb or ketogenic diet. The bread is baked to golden perfection with a slight crisp on the outside and soft texture inside, making it an excellent low-carb substitute for traditional bread.
Ingredients
Cloud Bread Ingredients
- 3 large eggs
- 1/2 teaspoon baking powder
- 3 tablespoons full-fat cream cheese (1 1/2 ounces)
- 1/4 teaspoon kosher salt
- 1/8 teaspoon onion powder
- 2 teaspoons white or black sesame seeds
Instructions
- Preheat the Oven: Arrange a rack in the center of the oven and heat it to 300°F (150°C). Line a rimmed baking sheet with parchment paper to prevent sticking.
- Separate the Eggs: Carefully separate the 3 large eggs, placing the whites in a large mixing bowl or the bowl of a stand mixer, and the yolks in a smaller bowl for mixing later.
- Add Baking Powder to Egg Whites: Sprinkle 1/2 teaspoon of baking powder over the egg whites to help stabilize them during whipping.
- Beat the Egg Whites: Using an electric hand mixer or a stand mixer with a whisk attachment, beat the egg whites on medium-high speed until stiff peaks form. This will take about 5 minutes with a hand mixer or approximately 2 minutes with a stand mixer.
- Microwave the Cream Cheese: Place 3 tablespoons of full-fat cream cheese into a small microwave-safe bowl. Microwave it in short 10-second bursts until very soft, about 30 seconds total. Stir the cream cheese until smooth and allow it to cool slightly.
- Mix Egg Yolks with Cream Cheese and Seasoning: Add the softened cream cheese, 1/4 teaspoon kosher salt, and 1/8 teaspoon onion powder to the egg yolks. Stir well until fully combined and smooth.
- Fold Yolks into Egg Whites: Gently fold the egg yolk mixture into the whipped egg whites until no visible streaks remain. Be careful not to deflate the whites to maintain the airy texture.
- Shape the Cloud Breads: Spoon a quarter of the batter (about 3/4 cup) onto the prepared baking sheet. Using the back of the spoon, gently flatten each portion into a round about 6 inches wide. Repeat this process for the remaining batter.
- Top with Sesame Seeds: Sprinkle approximately 1/2 teaspoon of sesame seeds evenly over each round to add texture and flavor.
- Bake: Place the baking sheet in the oven and bake the cloud bread for 25 to 28 minutes, or until the tops are golden brown.
- Cool: Remove the cloud bread from the oven and let it cool on the baking sheet for at least 20 minutes. This resting period helps the breads firm up and develop the perfect texture. Carefully lift the breads from the parchment paper before serving.
Notes
- This keto-friendly cloud bread uses simple ingredients that you likely have on hand, making it both easy and quick to prepare.
- Be gentle when folding the yolk mixture into the whipped egg whites to keep the bread light and fluffy.
- Letting the bread cool properly ensures it firms up and is easier to handle without breaking.
- You can customize the seasoning by adding herbs or spices if desired.
- Store any leftovers in an airtight container in the refrigerator for up to 2 days and reheat gently before serving.
Nutrition
- Serving Size: 1 cloud bread
- Calories: 99
- Sugar: 0.5 g
- Sodium: 138 mg
- Fat: 8.0 g
- Saturated Fat: 3.3 g
- Unsaturated Fat: 0.0 g
- Trans Fat: 0 g
- Carbohydrates: 1.3 g
- Fiber: 0.2 g
- Protein: 5.6 g
- Cholesterol: 0 mg


