
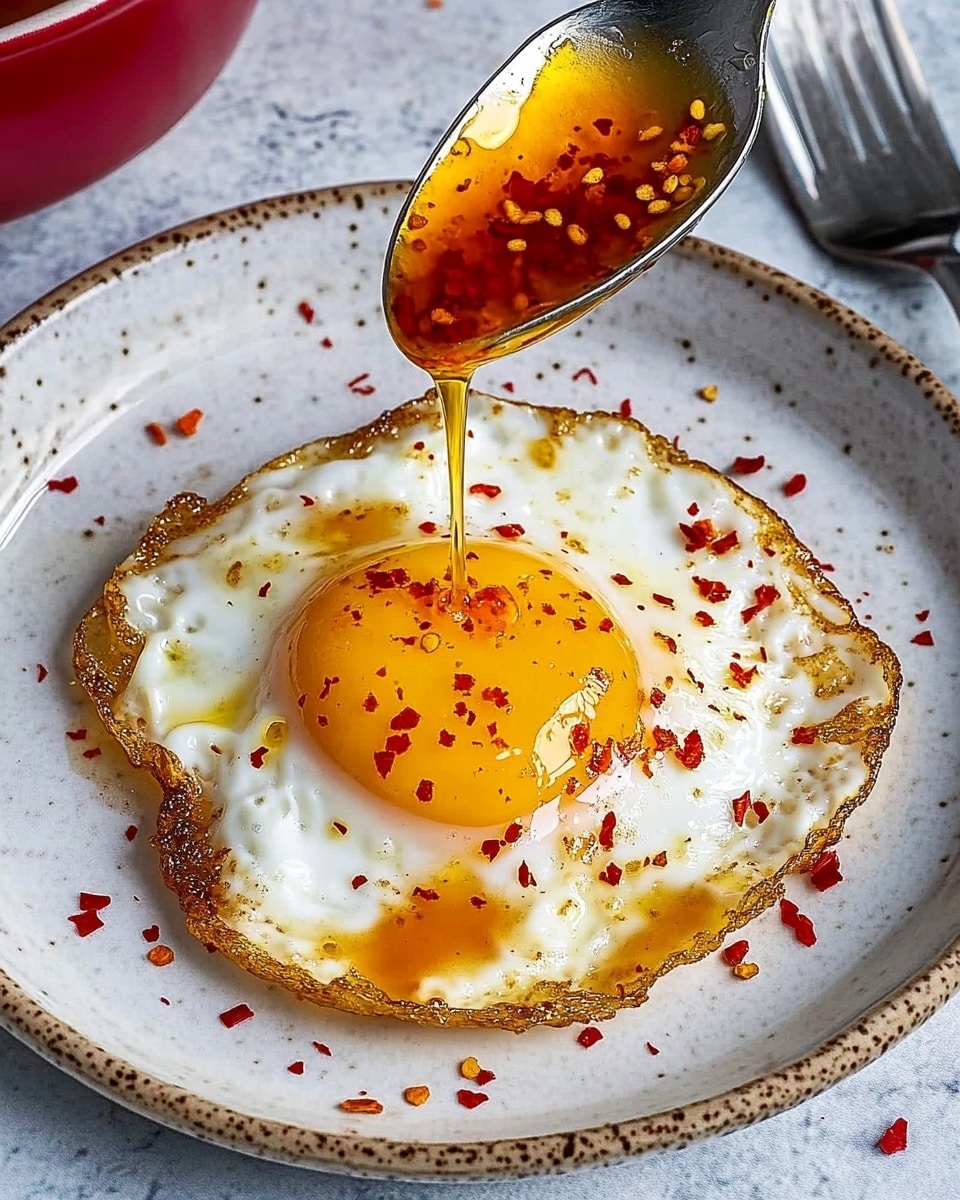
If you’re a fan of bold and spicy flavors, this Chili Crisp Recipe – How to Make Chili Crisp Recipe is a game-changer in your kitchen arsenal. I absolutely love how this homemade chili crisp has the perfect balance of crispy, aromatic bits with a punch of heat that wakes up any dish from noodles to simple rice bowls. Seriously, once you make your own, store-bought versions just won’t do it for you anymore.
When I first tried making this chili crisp, I was amazed at how the slow infused oil picks up layers of flavor from garlic, shallots, and serrano peppers, mingling beautifully with aromatic spices. You’ll find that making your own chili crisp not only lets you control the spice level but also lets you customize it any way you like — plus, it stores well, making it a handy condiment you’ll reach for again and again.
Why You’ll Love This Recipe
- Customizable Heat: You control how spicy or mild it is by adjusting the peppers and chili flakes.
- Rich Deep Flavor: Slow-infusing the oil with aromatics and spices makes every bite bursting with umami.
- Adds Crunch and Texture: The crispy bits of garlic and shallots elevate dishes beyond just heat.
- Versatile Condiment: Perfect on everything from eggs and dumplings to stir-fries and sandwiches.

Ingredients You’ll Need
The magic of this Chili Crisp Recipe – How to Make Chili Crisp Recipe comes from simple, accessible ingredients that pack maximum flavor. Getting good quality oils and fresh aromatics will really elevate the final product.
- Vegetable or peanut oil: I prefer peanut oil for its nutty flavor, but neutral vegetable oil works great.
- Serrano peppers: Don’t worry about finely chopping—rough pieces are perfect for slow infusion.
- Shallot: Adds a subtle sweetness and aroma that deepens the flavor.
- Garlic: Rough chopped for crispy, flavorful bits.
- Black or Sichuan peppercorns: Sichuan peppercorns add numbing heat, but black peppercorns work well if you don’t have them.
- Red chili flakes: Choose your favorite heat level here—gochugaru is a great smoky option.
- Smoked paprika or cayenne: Smoked paprika adds a lovely smoky touch, but cayenne works if you want more heat.
- Soy sauce: For rich umami depth.
- Sugar: Balances the heat and saltiness.
- MSG (optional): Enhances umami—feel free to use sea salt as an alternative.
- Cinnamon stick and star anise (optional): Add these for a fascinating warm spice dimension.
Variations
One of the best parts about this Chili Crisp Recipe – How to Make Chili Crisp Recipe is how easy it is to tweak to your liking. I love encouraging you to make this your own by experimenting with different spice combinations or flavor boosts.
- Spicy Kick: Adding extra cayenne or using hotter peppers like Thai bird’s eye will crank up the heat—my husband swears by this when he needs a real fire!
- Smoke Lover’s Edition: Using smoked paprika or even adding a chipotle chili powder lends a smoky depth that’s irresistible on grilled meats.
- Fragrant Spice Blend: Try infusing with additional spices like fennel seeds or cloves if you want to play with more aromatic notes.
- Vegan Umami Boost: Swap soy sauce with tamari or add mushroom powder to deepen the umami flavor without altering the vegan profile.
How to Make Chili Crisp Recipe – How to Make Chili Crisp Recipe
Step 1: Infuse the Oil Slowly
Start by adding the oil to a small pot with the serrano peppers, shallot, garlic, and peppercorns; add the cinnamon stick and star anise pods if you’re using them. Heat the oil on medium-low—patience is key here.
I learned from experience that rushing this step leads to raw-tasting oil or burnt bits that ruin the flavor, so keep it low and slow for about 20-30 minutes. You’ll see the aromatics gradually turn golden brown—that’s when the magic really happens.
Step 2: Mix Your Spices While It Cools
While the oil infuses and cools for a couple of minutes after you remove it from heat, mix your red chili flakes, smoked paprika (or gochugaru), soy sauce, sugar, and MSG (if you’re using it) in a heat-proof bowl. This helps everything blend evenly when you pour the oil over.
Step 3: Strain the Oil and Capture Those Crispy Bits
Strain the infused oil into your chili flake mixture. Don’t toss those crispy serrano, shallot, and garlic bits in the strainer! Let them cool for a few minutes until they crisp up fully, then pick out the cinnamon stick and star anise pods and swirl those crunchy bits back into your chili oil. This texture is what takes this chili crisp from good to unforgettable.
Step 4: Refrigerate and Let the Flavors Develop
Cover and refrigerate your chili crisp overnight, if you can wait that long! The flavors intensify beautifully after a day, making it even better than when freshly made. If your crispy bits aren’t quite crunchy enough, just gently heat them again in a bit of the chili oil until they crisp up.
Pro Tips for Making Chili Crisp Recipe – How to Make Chili Crisp Recipe
- Low and Slow Is Key: Heating the oil too quickly burns the aromatics, so keep it to medium-low and take your time.
- Oil Choice Matters: I’ve found peanut oil gives the best flavor, but if you have allergies, a neutral vegetable oil is a safe bet.
- Let It Rest: Don’t skip the refrigeration overnight — that’s when the flavors become complex and delicious.
- Crispy Bits Rescue: If the garlic or shallots aren’t crispy, reheat them gently in a little oil until crunchy; it’s worth it!
How to Serve Chili Crisp Recipe – How to Make Chili Crisp Recipe
Garnishes
I usually sprinkle fresh chopped scallions or cilantro on top when serving dishes with chili crisp, as the fresh herbs complement the spicy, oily crunch beautifully. A squeeze of lime over the plate is also a nice tangy counterpoint.
Side Dishes
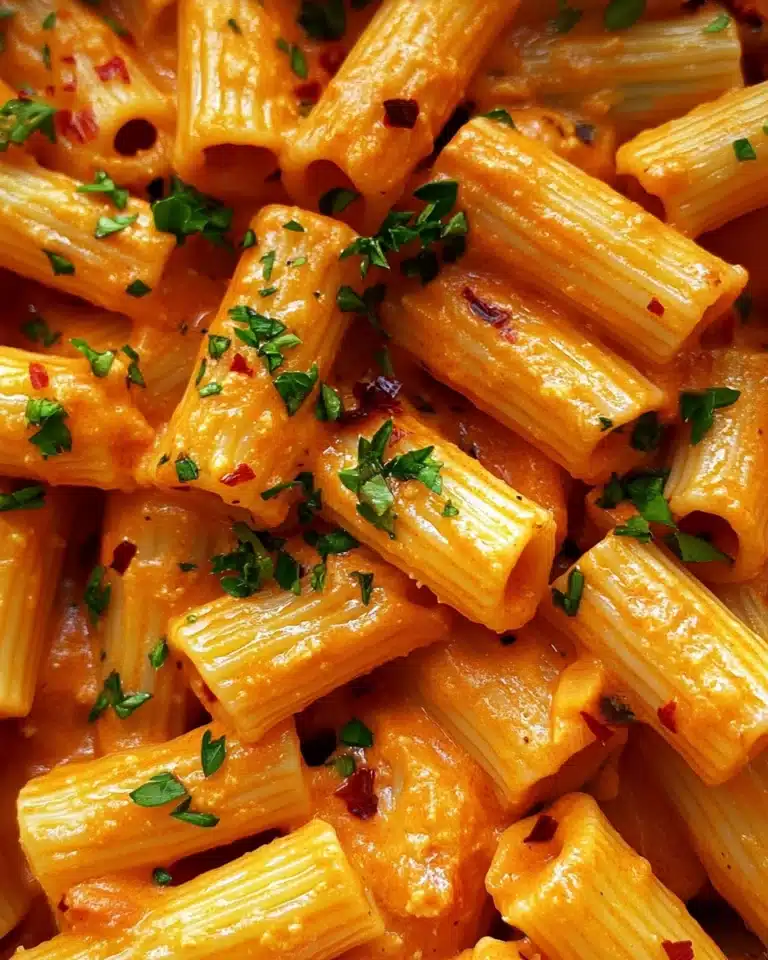
This chili crisp shines next to simple sides like steamed rice, fried eggs, dumplings, or roasted vegetables. I also love tossing it into noodle bowls or using it as a dip for crispy tofu or chicken wings.
Creative Ways to Present
For dinner parties, I like serving chili crisp in small ramekins alongside dishes so guests can add as much or as little as they want. It also makes a killer gift when jarred nicely with a handwritten label—my foodie friends always go crazy for it!
Make Ahead and Storage
Storing Leftovers
Store your chili crisp in a clean, airtight jar in the refrigerator. I’ve kept mine fresh and tasty for up to a month, and each day the flavor seems to get better. Just make sure to use a clean spoon each time to avoid contamination.
Freezing
I don’t typically freeze chili crisp because the texture can change, but if you do, make sure it’s in a tightly sealed container. Thaw it gently at room temperature and stir well before using.
Reheating
If the crispy bits soften after refrigeration, just warm the chili crisp gently in a pan or microwave for a few seconds to revive the crunch. Stir well and let it cool slightly before serving to enjoy that amazing texture.
FAQs
-
Can I use other types of peppers for this Chili Crisp Recipe?
Absolutely! Serrano peppers are great for their balanced heat, but you can substitute them with fresno, jalapeños, or even bird’s eye chilies if you prefer hotter chili crisp. Each will provide slightly different flavor and heat profiles.
-
Is MSG necessary in this chili crisp recipe?
MSG is optional—it enhances umami but you can easily replace it with a pinch of sea salt if you’re avoiding additives. The chili crisp will still be delicious!
-
How long does homemade chili crisp last in the refrigerator?
It typically keeps well for about one month refrigerated. Always use a clean spoon to avoid introducing moisture or bacteria that can shorten its life.
-
Can I make this chili crisp oil-free or with less oil?
Unfortunately, the oil is essential as it carries the heat and flavor while providing texture. Reducing oil drastically will change the character of the chili crisp.
Final Thoughts
I can honestly say that once you try this Chili Crisp Recipe – How to Make Chili Crisp Recipe, it becomes a staple in your fridge and a highlight in your meals. I love how it instantly adds brightness, heat, and crunchy texture to everything from weeknight dinners to special dishes. Give it a go—you’ll find making your own chili crisp is easier than it looks, and you’ll be so proud of the flavor punch it brings!
Print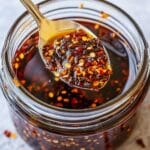
Chili Crisp Recipe – How to Make Chili Crisp Recipe
- Prep Time: 15 minutes
- Cook Time: 25 minutes
- Total Time: 40 minutes plus overnight resting
- Yield: Approximately 2 cups
- Category: Condiment
- Method: Stovetop
- Cuisine: Chinese
- Diet: Vegan
Description
This Chili Crisp recipe is a vibrant and flavorful spicy condiment made by infusing oil with serrano peppers, shallots, garlic, and aromatic spices, then mixing it with chili flakes and savory seasonings. Perfect for adding a crunchy, spicy kick to noodles, rice, dumplings, and more, this oil-based chili crisp develops deeper flavors after resting overnight.
Ingredients
Oil and Aromatics
- 1.5 cups vegetable oil or peanut oil
- 2 serrano peppers, rough chopped
- 1 shallot, rough chopped
- 10 cloves garlic, rough chopped
- 1 teaspoon black peppercorns or Sichuan peppercorns
- 1 3-inch cinnamon stick (optional)
- 4 star anise pods (optional)
Chili Flake Mixture
- ¼ cup red chili flakes
- 1 tablespoon smoked paprika or Gochugaru seasoning blend or cayenne for more heat
- 1 tablespoon soy sauce
- 1 teaspoon sugar
- ½ teaspoon MSG (optional; can substitute sea salt)
Instructions
- Infuse the Oil: Add the vegetable or peanut oil to a small pot along with the serrano peppers, shallot, garlic, black or Sichuan peppercorns, and optional cinnamon stick and star anise pods. Heat over medium-low heat and simmer gently for 20-30 minutes, allowing the ingredients to brown and the flavors to infuse into the oil. The time may vary depending on the size of the chopped peppers and oil temperature.
- Cool the Oil: Remove the pot from heat and let it cool for 2-3 minutes. This resting period helps deepen the infused flavors.
- Prepare the Chili Mixture: In a separate heatproof bowl, combine the red chili flakes, smoked paprika or chosen seasoning, soy sauce, sugar, and MSG or salt. Mix well.
- Strain and Combine: Strain the infused oil through a fine sieve into the chili flake mixture to separate out the solids. Reserve the crispy serrano-shallot-garlic bits in the strainer to cool further and crisp up.
- Final Assembly: Remove the cinnamon stick and star anise pods if used. Swirl the crispy bits back into the mixed oil and chili flakes. Cover and refrigerate overnight to allow the flavors to develop further. Stir well before serving.
Notes
- Yields about 2 cups of chili crisp and can be stored in the refrigerator for up to 1 month.
- The chili crisp can be used immediately but tastes better after resting at least a day to intensify flavors.
- If the crispy bits don’t crisp up fully, gently reheat them with a little chili oil in the pot to achieve crispiness.
Nutrition
- Serving Size: 1 tablespoon (15 ml)
- Calories: 99 kcal
- Sugar: 0.4 g
- Sodium: 62 mg
- Fat: 10 g
- Saturated Fat: 2 g
- Unsaturated Fat: 8 g
- Trans Fat: 0 g
- Carbohydrates: 2 g
- Fiber: 1 g
- Protein: 0.5 g
- Cholesterol: 0 mg


