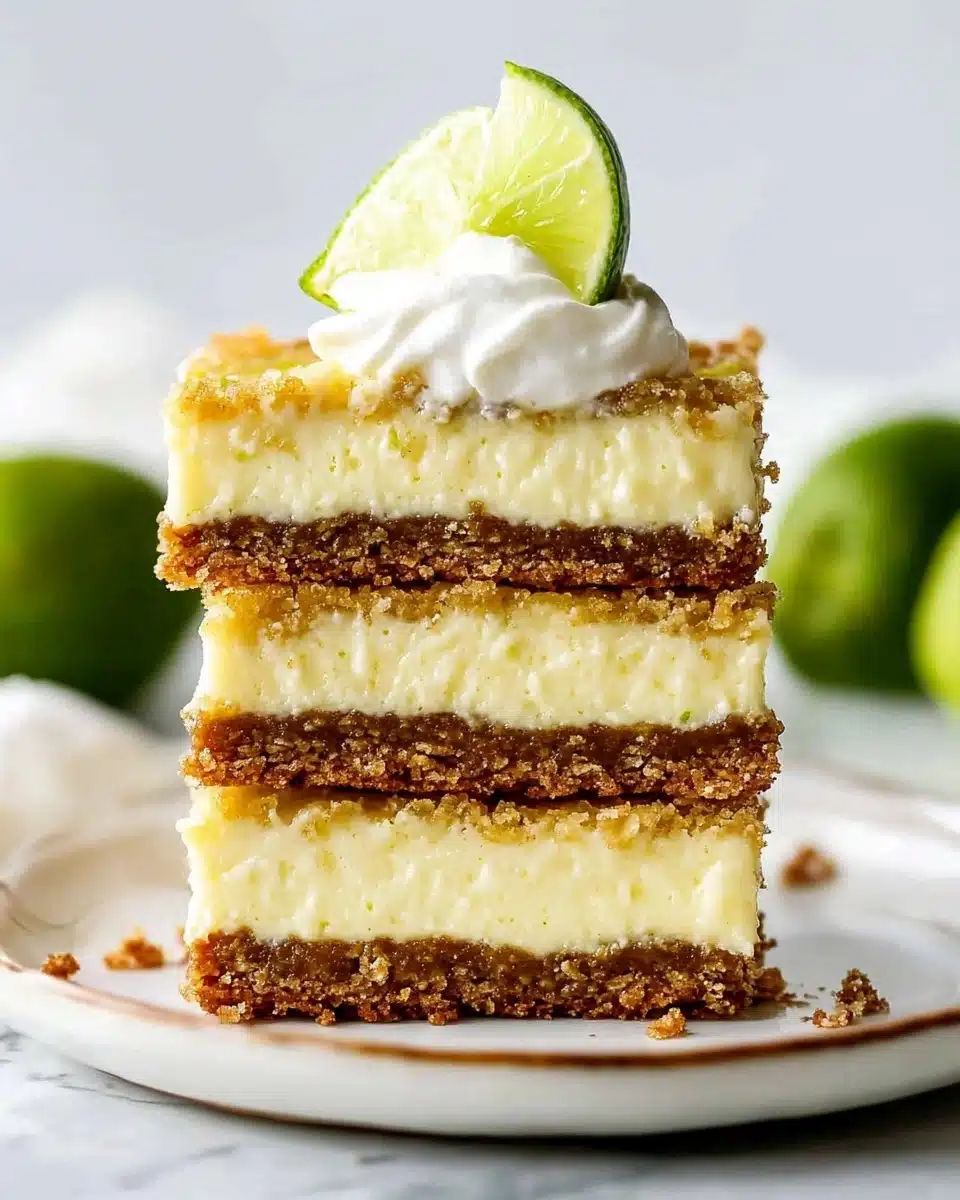
If you’re looking for the creamiest, zingiest, most joyfully retro dessert, these Key Lime Pie Bars might just sweep you off your feet. Think: all the sunshine-soaked charm of a classic Key lime pie, made fun and portable for bar-style snacking! Each bite blends a crunchy graham cracker crust with a luscious, vibrant lime filling—whipped to cloud-like perfection—and just the right amount of sweetness.
Why You’ll Love This Recipe
- Bursting with Real Citrus Flavor: Each bar packs a punch of fresh Key lime juice and zest for tangy brightness you just can’t fake.
- Super Creamy, Tangy Filling: The touch of cream cheese creates a meltingly smooth texture—think silk meets citrus!
- Easy to Make, Easy to Serve: Whip these up with simple pantry ingredients and enjoy bar-sized treats—no tricky slicing required.
- Perfect for Make-Ahead: These Key Lime Pie Bars actually taste better chilled and are fantastic for prepping in advance.
Ingredients You’ll Need
Here’s the magical part: the ingredients for these Key Lime Pie Bars are simple but mighty, and each one plays a starring role. From the buttery graham cracker crust to the rich, tangy lime filling, every component brings delicious balance to the bars.
- Graham Crackers: The base of our crust, graham crackers deliver a sweet, nostalgic crunch. Crush them super finely for the best texture.
- Unsalted Butter: Melted and mixed into the crumbs, it binds everything together and gives the crust golden richness.
- Granulated Sugar: Just enough to add sweetness and help the crust crisp up in the oven.
- Cream Cheese: Adds luxurious creaminess to the filling, creating that melt-in-your-mouth consistency.
- Egg Yolks: They give the filling its structure and lovely yellow color—don’t skip separating them from the whites!
- Sweetened Condensed Milk: The heart of classic Key lime pie, lending a dreamy sweetness and silky body.
- Key Lime Juice: This is where the tart magic happens. Fresh is best, but bottled works too in a pinch!
- Lime Zest: Intensifies flavor and adds those irresistible green flecks.
- Whipped Cream & Lime Slices (Optional): For an extra flourish of creaminess and a pop of color when serving.
Variations
This is such a fun recipe to tweak based on what you have or love. Don’t be afraid to get creative with your Key Lime Pie Bars—whether you’re working around dietary needs or just in the mood for something new, there’s lots of wiggle room!
- Gingersnap Crust: Swap the graham crackers for crushed gingersnap cookies for a spicy, aromatic twist that pairs beautifully with the lime.
- Digestive Biscuits: If you can’t find graham crackers, ground digestive biscuits work perfectly (especially for UK bakers!).
- Coconut Topping: Sprinkle toasted coconut on top before baking for extra tropical flair and crunch.
- Mini Key Lime Pie Bites: Bake the filling in lined muffin tins for single-serve treats that are perfect for parties.
How to Make Key Lime Pie Bars
Step 1: Prepare Your Pan and Preheat
Start by preheating your oven to 350°F (177°C). Then, line a 9-inch square baking pan with parchment paper, making sure to leave extra overhang on the sides—this “sling” will make it so easy to lift out your perfectly chilled bars for slicing later. Trust me, you’ll be thankful for this step when it’s time to serve!
Step 2: Make the Graham Cracker Crust
Pulverize your graham crackers into fine crumbs using a food processor, or simply by sealing them in a bag and smashing with a rolling pin (great for stress relief, honestly!). Combine the crumbs with sugar and pour in your melted butter. Stir until the mixture is sandy and fully coated, then press it evenly into the bottom of your prepared pan. The tighter you pack it, the sturdier your crust will be.
Step 3: Prebake the Crust
Pop the crust in the oven for 10 minutes. This short prebake gives it sturdiness—helping the crust hold up to the creamy filling. Let it cool for a few minutes while you whip up the filling; the contrast between crisp crust and luscious filling is what makes these bars irresistible.
Step 4: Mix the Lime Filling
Using a mixer, beat your softened cream cheese until completely smooth. Beat in the egg yolks one at a time, making sure everything is fully combined, then add sweetened condensed milk, key lime juice, and lime zest, mixing until you have a glossy, pale green-blonde batter. A final quick whisk by hand ensures you catch any hidden cream cheese lumps for a silky finish.
Step 5: Bake Until Just Set
Pour the lime filling onto your slightly cooled crust and spread into an even layer. Bake for 18–20 minutes, keeping a close eye: the edges should look set but the center will have a gentle little wobble. Don’t overbake, or you’ll lose that creamy texture that makes Key Lime Pie Bars truly dreamy.
Step 6: Chill, Slice, and Serve
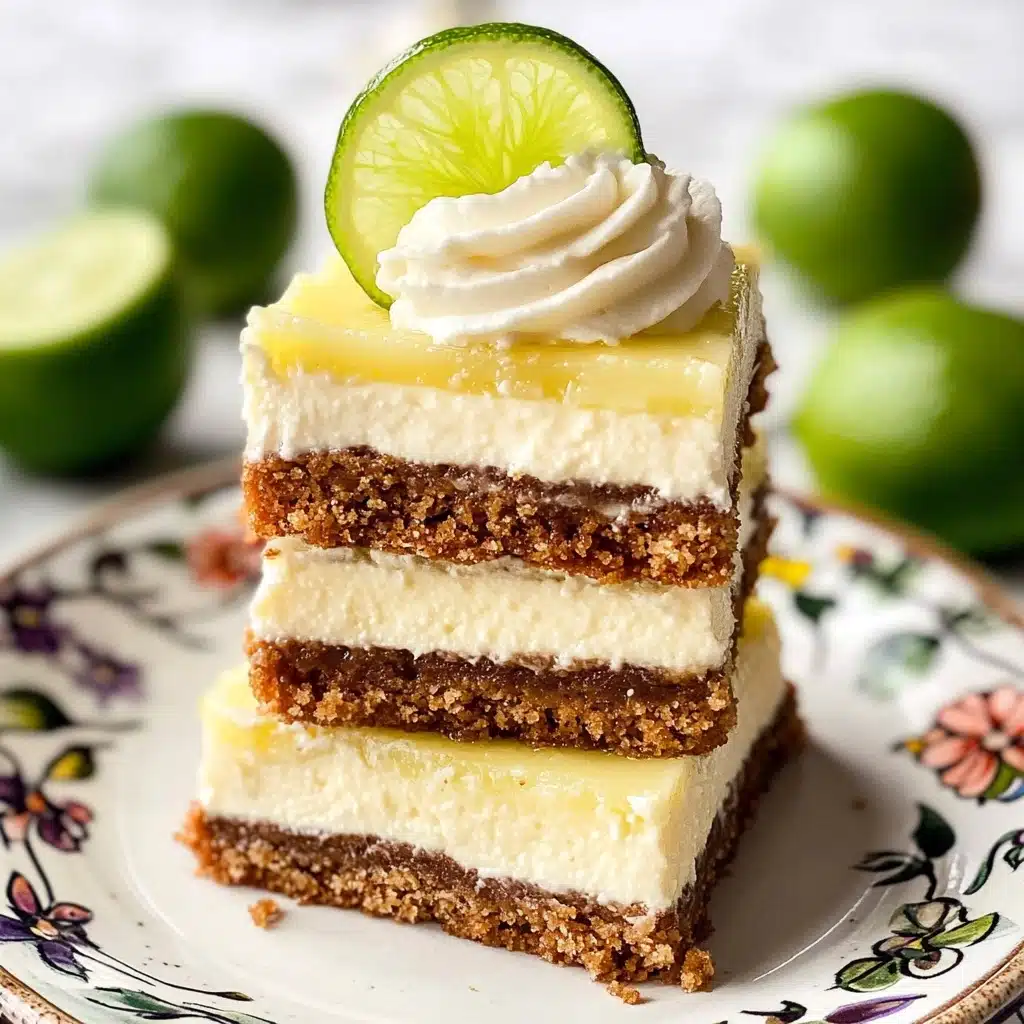
Let the pan cool on a wire rack for 30 minutes, then transfer it to the refrigerator to chill for at least 2–3 hours. This sets the bars for clean slicing. When you’re ready, lift out using the parchment and cut into squares. Garnish with whipped cream, lime slices, or extra zest for that classic Key lime pie flair!
Pro Tips for Making Key Lime Pie Bars
- No-Lump Guarantee: Make sure your cream cheese is at room temperature and whisk the filling by hand after mixing to eliminate any sneaky lumps.
- Parchment Sling Hack: Always line the pan with a parchment overhang—you’ll thank yourself when it’s time to lift out those gorgeous bars.
- Tartness Level: Use fresh Key lime juice if possible for the brightest flavor, but bottled is your friend if limes are scarce—it’s still delicious!
- Chilling is Key: Don’t rush the chill—giving the bars plenty of time in the fridge makes slicing so much easier and lets the flavors fully bloom.
How to Serve Key Lime Pie Bars
Garnishes
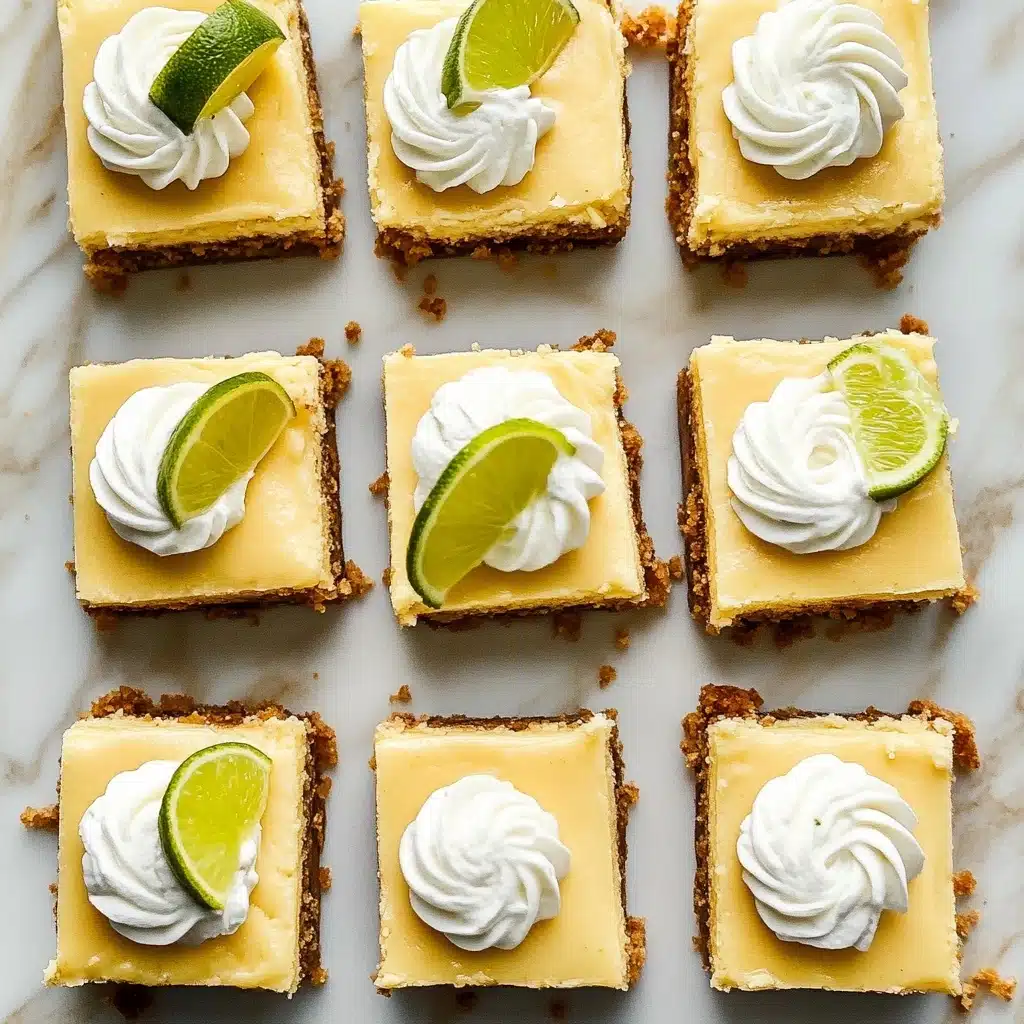
Go classic or get playful! A swirl of whipped cream piped on top, thinly sliced fresh lime wheels, or a sprinkle of extra lime zest will make your Key Lime Pie Bars pop. For extra fun, try candied lime peels or even a dusting of crushed graham crackers—every garnish brings something new to the party.
Side Dishes
These bars shine solo, but if you want to make a full dessert spread, pair them with a bowl of fresh berries, a scoop of coconut sorbet, or a platter of crunchy vanilla cookies. Their refreshing tartness also makes them a bright finish after a seafood or barbecue meal.
Creative Ways to Present
Arrange your Key Lime Pie Bars in neat rows on a cake stand for a party, or slip them into cupcake liners for easy grab-and-go servings. For elegant occasions, dress each square with a dollop of cream and a mini edible flower, or layer small bars parfait-style with whipped cream in little jars for personal trifle cups.
Make Ahead and Storage
Storing Leftovers
Once baked and cooled, these Key Lime Pie Bars keep beautifully in an airtight container in the refrigerator for up to 5 days. They actually taste even better after a day—the crust softens just a touch, and the filling gets creamier and even more flavorful.
Freezing
Yes, these bars freeze like a dream! Simply wrap individual bars tightly or stack them with parchment between layers in an airtight container. Freeze for up to three months, then thaw overnight in the fridge before serving—ideal for make-ahead dessert lovers.
Reheating
No reheating necessary! These bars are best served well chilled, straight from the fridge. If frozen, just let them thaw gently overnight so you keep that silky texture and vibrant flavor.
FAQs
-
Can I use regular lime juice instead of Key lime juice?
Absolutely! While true Key lime juice offers uniquely floral notes, regular Persian limes work wonderfully and still give your Key Lime Pie Bars that essential tartness and brightness.
-
How do I get clean cuts when slicing the bars?
For crisp, bakery-worthy edges, use a large, sharp knife, wipe it clean between cuts, and make sure the bars are well chilled—they’ll slice much more cleanly that way.
-
Can I double the recipe for a larger crowd?
Yes! Double all the ingredients and bake in a 9×13-inch pan. The crust prebakes as usual, and the filling may take closer to 35 minutes; just check for that telltale little wobble in the center before pulling from the oven.
-
What if I don’t have graham crackers?
No problem—digestive biscuits make a fab substitute, and even gingersnap cookies give an unexpectedly wonderful kick. Just adjust the amount of sugar a bit to balance with the cookie’s sweetness or spice.
Final Thoughts
If you ever needed a sign to dive into a tangy, creamy tray of sunshine, let these Key Lime Pie Bars be it. Whip them up for your next gathering or just because you’re craving something sweetly nostalgic—once you try one, you’ll see why they’re such a crowd favorite. I can’t wait for you to taste these blissful bites and share them with your favorite people!
Print
Key Lime Pie Bars Recipe
- Prep Time: 15 minutes
- Cook Time: 20 minutes
- Total Time: 3 hours, 30 minutes
- Yield: 16 bars
- Category: Dessert
- Method: Baking
- Cuisine: American
- Diet: Vegetarian
Description
These Key Lime Pie Bars are a delightful twist on the classic dessert, featuring a buttery graham cracker crust and a creamy, tangy key lime filling. They are easy to make and perfect for any occasion.
Ingredients
Crust:
- 12 full-sheet graham crackers (1 and 1/2 cups (180g) graham cracker crumbs)
- 6 Tablespoons (85g) unsalted butter, melted
- 1/4 cup (50g) granulated sugar
Filling:
- 4 ounces (113g) full-fat brick cream cheese, softened
- 4 large egg yolks
- 14-ounce (397g) can sweetened condensed milk
- 1/2 cup (120ml) key lime juice
- 2 teaspoons lime zest
Instructions
- Preheat oven: Preheat the oven to 350°F (177°C) and line a 9-inch square baking pan with parchment paper.
- Make the crust: Crush graham crackers, mix with sugar and melted butter, press into pan, and bake for 10 minutes.
- Make the filling: Beat cream cheese, add egg yolks, then mix in condensed milk, lime juice, and zest. Pour over crust.
- Bake: Bake for 18-20 minutes until set with a slight jiggle in the center.
- Cool and chill: Cool for 30 minutes, then chill in the refrigerator for 2-3 hours.
- Serve: Lift out of the pan, cut into squares, garnish as desired, and enjoy!
Notes
- You can freeze the bars for up to 3 months.
- For non-US readers, substitute graham crackers with digestive biscuits.
- To make a gingersnap crust, use crushed gingersnap cookies and melted butter.
- For a 9×13-inch pan, double the ingredients and adjust baking times.
Nutrition
- Serving Size: 1 bar
- Calories: 240
- Sugar: 18g
- Sodium: 180mg
- Fat: 12g
- Saturated Fat: 7g
- Unsaturated Fat: 4g
- Trans Fat: 0g
- Carbohydrates: 30g
- Fiber: 0.5g
- Protein: 4g
- Cholesterol: 85mg


