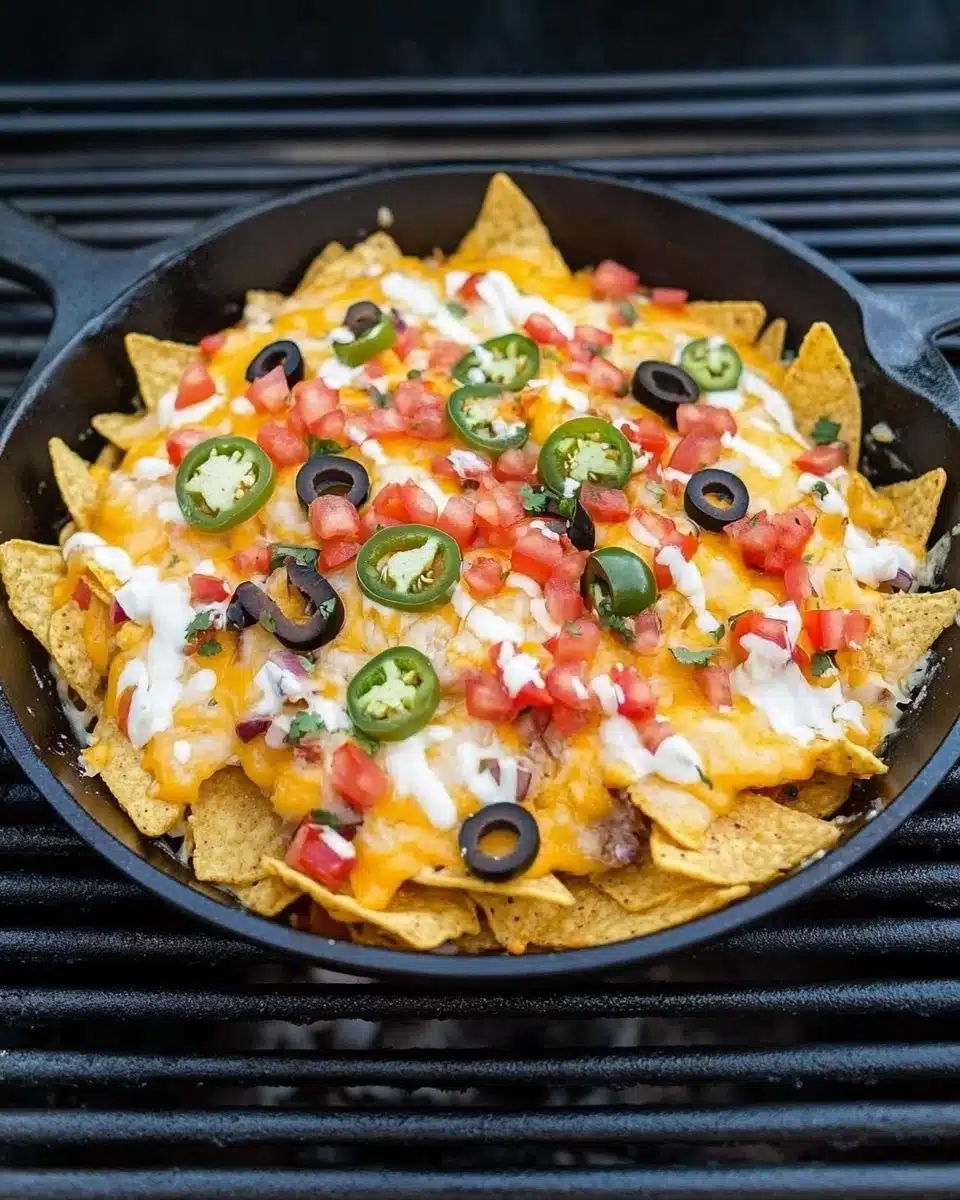
If you’re searching for a crowd-pleasing, ridiculously easy outdoor snack that feels downright festive, these Campfire Nachos are a total game-changer! Layered with gooey cheese, briny olives, zingy scallions, and fire-kissed jalapeños, they’re the ultimate combination of crunchy, melty, spicy, and fresh—all made right in your trusty cast iron skillet.
Why You’ll Love This Recipe
- Ultimate Outdoor Treat: Campfire Nachos turn any campout, backyard hang, or weeknight bonfire into a party—with barely any effort and zero special equipment.
- Customizable Layers: Every mouthful bursts with texture and flavor, and you can tweak the toppings to absolutely everyone’s taste (no two nacho pans taste the same!).
- Ready in 15 Minutes: These nachos come together in a flash, making them perfect for hungry campers or last-minute guests.
- Crispy, Cheesy Perfection: Thanks to the cast iron skillet, every chip gets melty, toasted edges without being soggy—pure nacho nirvana!

Ingredients You’ll Need
Campfire Nachos are a tribute to simplicity—each ingredient is handpicked for maximum flavor and color, and together, they make magic. Every layer plays a key role, so use favorites and don’t be shy about piling it on!
- Tortilla chips: Thick, sturdy chips stand up best to melty cheese and the heat of the fire—skip thin or restaurant-style so everything holds its crunch.
- Shredded taco cheese blend: This mix melts perfectly and packs in flavor; feel free to use cheddar, Monterey Jack, or your personal favorite blend.
- Sliced black olives: They bring a pop of saltiness and just the right amount of briny bite.
- Sliced green onions: Their fresh, mild zing cuts through the richness and perks up each mouthful.
- Sliced jalapeños: For a little kick and gorgeous color—remove the seeds if you prefer milder heat.
- Cilantro (optional): Chopped fresh cilantro adds a burst of color and herbal freshness (totally optional, but highly recommended).
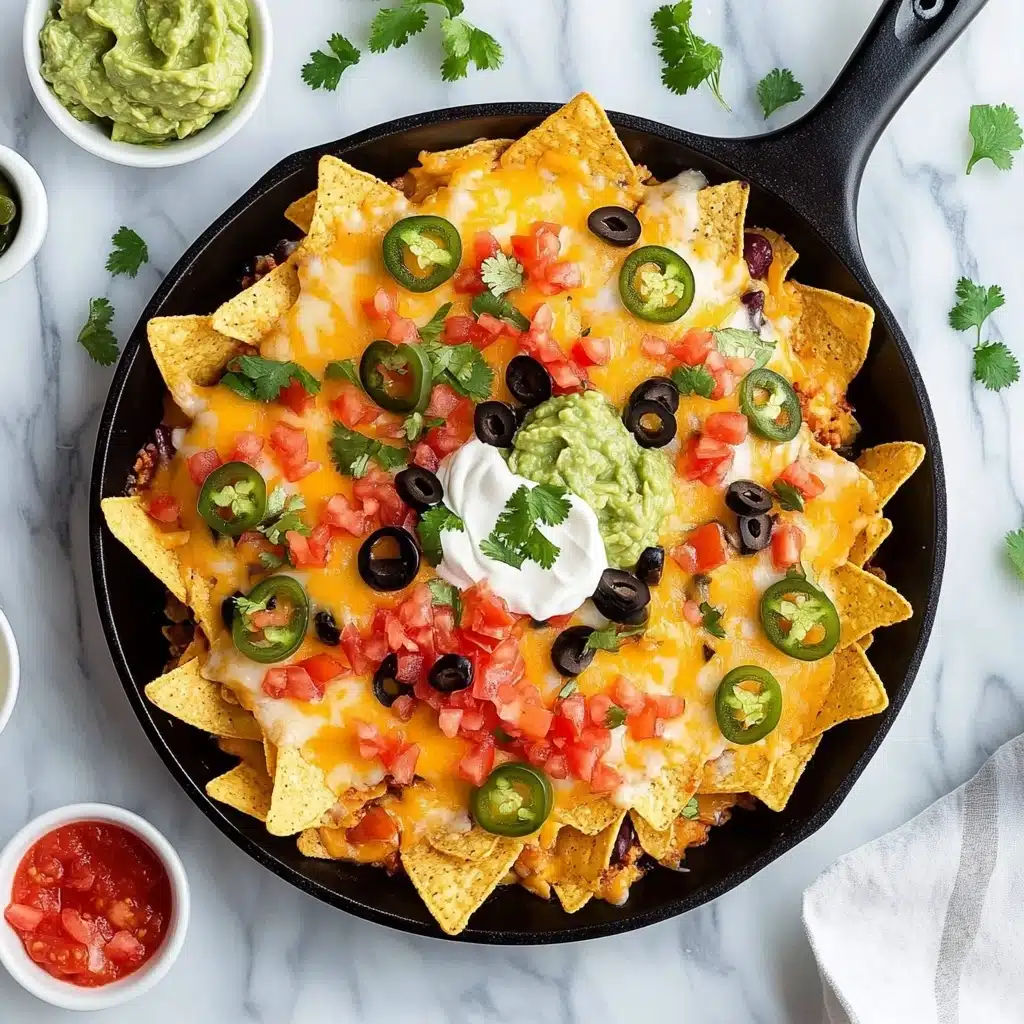
- Salsa, sour cream, and guacamole (for serving): These classic toppings take Campfire Nachos totally over the top and encourage serious dipping!
Variations
Campfire Nachos are endlessly customizable, which means you can riff endlessly based on whatever you love (or happen to have in your cooler or pantry). Here are some of my favorite ways to switch things up—feel free to get creative!
- Loaded Protein: Scatter some leftover pulled chicken, seasoned ground beef, or black beans between the layers for extra heartiness.
- Veggie Overload: Top with diced bell peppers, corn kernels, or even sautéed mushrooms for a colorful, garden-fresh twist.
- Dairy-Free: Use your favorite vegan cheese blend and plant-based sour cream to keep these nachos totally animal product–free.
- Breakfast Nachos: Crack a few eggs on top just before the last few minutes of cooking for a sunrise-ready treat that’s perfect with coffee!
How to Make Campfire Nachos
Step 1: Prepare Your Skillet and Fire
First, get your campfire or grill going so the heat is medium—not scorching-hot, just hot enough that you can hold your hand nearby for a few seconds. Grab your 10.5-inch cast iron skillet and lightly oil it to prevent any sticky situations. Gather all your Campfire Nachos ingredients around you, because this is a quick assembly job!
Step 2: Build the First Layer
Scatter about a third of the tortilla chips on the bottom of the skillet in an even layer. Now sprinkle on a third of the cheese, followed by half the black olives and half of the green onions. This layering makes sure no chip gets left out—every bite is loaded!
Step 3: Add More Layers
Add another third of the chips on top, plus a third more cheese—don’t be afraid to gently press down if your skillet is getting full. Finally, make your top layer with all the remaining chips, cheese, olives, and green onions. Arrange your fresh jalapeño slices on top for a pop of heat and color.
Step 4: Cook Until Melty
Loosely cover the skillet with foil—this keeps things melty without making them mushy. Place the skillet right over the fire or grill and let it cook for 10–15 minutes. You’ll know it’s ready when the cheese is bubbly and the edges of the chips look a little toasty.
Step 5: Garnish and Serve
Carefully take off the foil (watch for steam!), sprinkle lots of chopped cilantro over the top, and serve immediately with sides of salsa, sour cream, and creamy guacamole. Be ready to see every hand reach in at once—Campfire Nachos disappear fast!
Pro Tips for Making Campfire Nachos
- Skillet Selection: A well-seasoned cast iron skillet is your best friend—its even heat keeps the nachos crisp on the bottom and perfectly gooey on top.
- Layer Like a Pro: Don’t dump everything in all at once—layering chips and toppings ensures you don’t end up with a sad stack of naked chips at the bottom.
- Watch the Fire: Campfire Nachos cook quickly over a medium fire or grill—check after 10 minutes to make sure your cheese is melting not burning!
- Serving Safety: The skillet will be HOT—transfer it to a sturdy surface and let eager hands know before digging in!
How to Serve Campfire Nachos
Garnishes
Fresh garnishes make these Campfire Nachos sing! A generous sprinkle of chopped cilantro adds life and color, while freshly sliced jalapeños, a squeeze of lime, or a handful of diced tomatoes provide extra bursts of freshness if you want to mix it up.
Side Dishes
Pair these nachos with grilled corn on the cob, a bright watermelon salad, or a big pitcher of icy lemonade. If you’re making them for dinner, some quick-cooked campfire beans or a cool cucumber salad make great companions.
Creative Ways to Present
For an interactive twist, serve Campfire Nachos straight from the skillet and let everyone dive in with their hands (rustic and fun!), or scoop out portions into paper boats for easy, mess-free sharing. You can even set out a nacho bar with extra toppings so everyone can customize their own mountainous pile.
Make Ahead and Storage
Storing Leftovers
If you somehow end up with leftover Campfire Nachos, transfer them to an airtight container once cooled—they’ll keep in the fridge for up to two days. They’ll lose some crunch, but all those flavors just keep mingling.
Freezing
I don’t recommend freezing nachos as the chips will become soft and the cheese a bit grainy once thawed. They truly shine fresh off the fire, so make just what you need—or invite extra campers over!
Reheating
To revive leftover nachos, spread them on a baking sheet and reheat in a 350°F oven or over gentle campfire heat until warmed through. Cover loosely with foil to avoid drying out, and add fresh garnishes just before serving.
FAQs
-
Can I make Campfire Nachos without a campfire?
Absolutely! You can prepare these nachos on a gas or charcoal grill, or even in your oven at home. The important thing is to use indirect, medium heat and keep them covered so the cheese gets nice and melty.
-
What’s the best cheese to use for Campfire Nachos?
A shredded taco blend is my go-to because it melts beautifully and adds tons of flavor. Cheddar, Monterey Jack, or even pepper jack also work great—use whatever cheese you love or have handy.
-
How do I keep the chips from getting soggy?
Layer the ingredients as described and avoid adding too many watery toppings (like tomatoes or wet beans) before cooking. Cover the nachos loosely with foil so steam escapes, and don’t overcook them—just melt the cheese and dig in!
-
Can I prepare Campfire Nachos ahead of time?
You can layer the chips, cheese, and veggies in your skillet before you head out—just add jalapeños and cook right before serving for best results. Bring garnishes and dips in separate containers for the freshest finish.
Final Thoughts
There’s something magical about gathering around a campfire and sharing food, and Campfire Nachos embody that spirit perfectly. Give them a try—you’ll love how easy, fast, and shareable they are. Grab your skillet, gather your favorite people, and let the nacho feast begin!